How to Fix Grainy Photos with 5 Easy Methods

 4.9
Votes: 261
(Rated: )
4.9
Votes: 261
(Rated: )
Click! You just took an incredible evening cityscape that you can't wait to show off. But when you open it on your computer, you're dismayed to see your pristine photography marred by fuzzy digital noise. At this point you might ask yourself, "Why are my photos grainy, and how can I fix them?"
There are many reasons that camera noise can appear in an image, but most often the culprit is low light shooting and/or an overly high ISO number. In this article, we'll show you 5 easy methods to avoid those causes and minimize pesky grain when it does show up in your photographs. Soon you will display that once-noisy cityscape with pride!
Want to fix your grainy shot right now with minumum effort?
Here's a smart tool that will do the job in 5 minutes!
It’s easier to prevent noise than to fix it! Start here:
- Widen your aperture to let in more light.
- Keep your ISO below 1600 whenever possible.
- Shoot with a tripod to allow longer shutter speeds.
- Bracket your exposures for a variety of shots to choose from.
If the damage is done, you can reduce noise in photos with these top methods:
Way #1. Enhance your grainy photos in PhotoWorks
Way #2. Get rid of noise in Lightroom
Way #3. Reduce digital noise in Photoshop
Way #4. Clean up digital noise using online apps
Way #5. Fix your grainy images on a mobile device
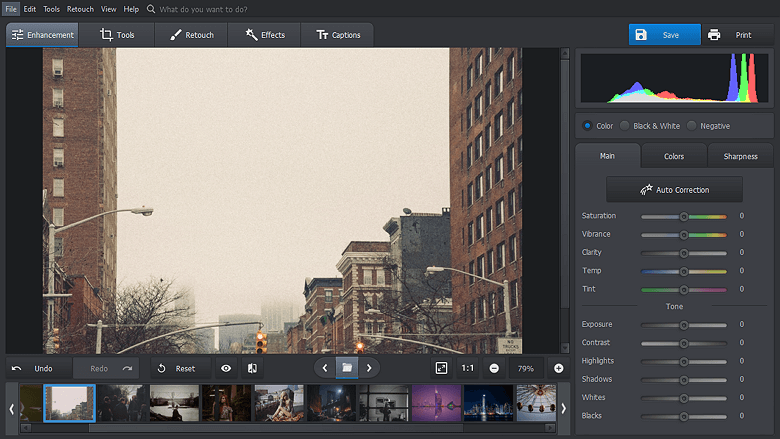
Way 1. Enhance Your Grainy Photos in PhotoWorks
The most user-friendly method by far! PhotoWorks, an intelligent photo correction program, delivers professional-looking noise reduction without a steep learning curve. Remove noise from photos in moments and complete more images in less time than ever before. Just follow these 4 quick steps:
Step 1. Open Your Image in PhotoWorks
The startup wizard will help you find your photo wherever it is stored on your computer.
Open your picture with PhotoWorks
Step 2. Navigate to the Noise Reduction Options
Simply click on the Tools tab, then find Noise Reduction in the menu to your right.
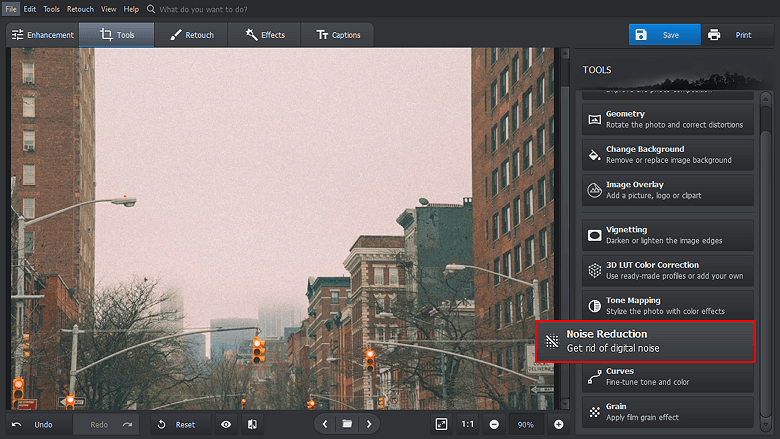
Switch to the Tools tab and choose the Noise Reduction tool
Step 3. Get Rid of Noise by Adjusting the Amount of the Effect
Use the Amount slider to decrease the appearance of image noise. Hit Apply when you are satisfied.
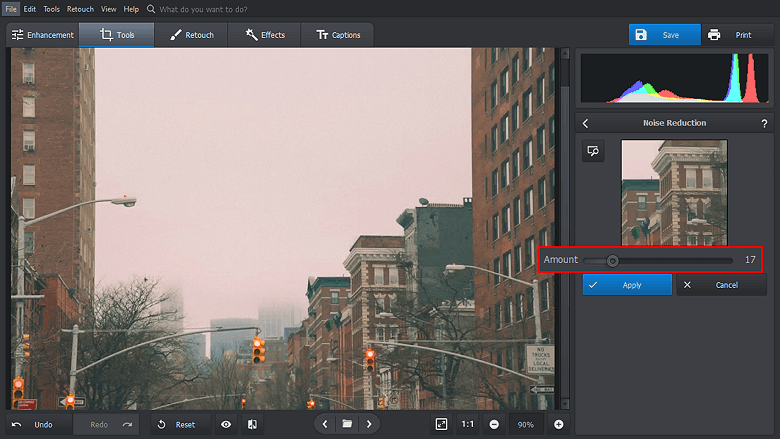
Eliminate all the fuzziness in your picture by dragging a slider
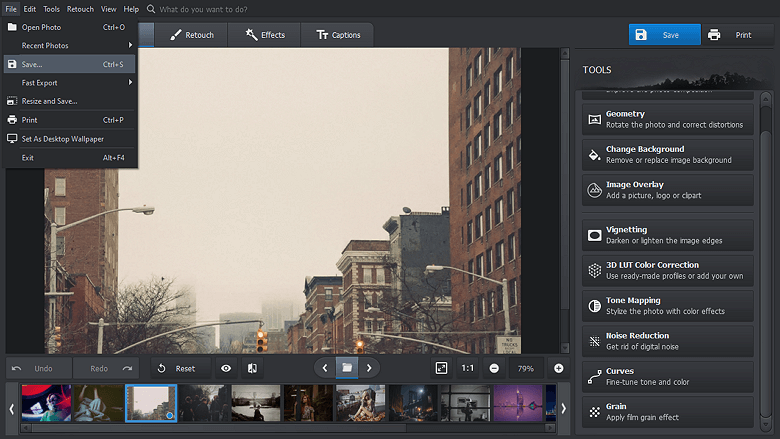
Step 4. Save Your Newly Edited Image and Start on the Next One
Use Save or Fast Export to create a version of your image to post online!
Save your denoised picture in a suitable format
Doesn't that sound easy? PhotoWorks makes it possible to denoise a photo in just a few seconds. Click below to download a free trial and see PhotoWorks in action!
Way 2. Reduce Noise in Lightroom in Under 5 Minutes
What if you already have a collection in Lightroom? While this software does not offer the streamlined workflow you're accustomed to in PhotoWorks, you are still only a few steps away from fixing those specks covering your PNG. Here's how to do it in only 3 steps:
Step 1. Open Your Image in the Develop Module
This is where all the editing happens. Now scroll down the menu to your right and find the Detail set of options.
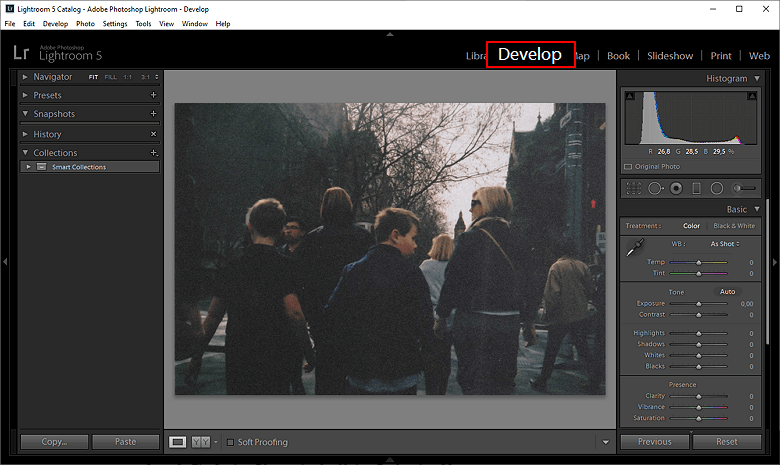
Open your image with Lightroom and switch to the Develop tab
Step 2. Fix Grainy Photos in the Noise Reduction Menu
Manage the texture of luminance and color noise with Lightroom's series of sliders. Experiment with the Detail, Contrast, and Smoothness sliders for a custom finish.
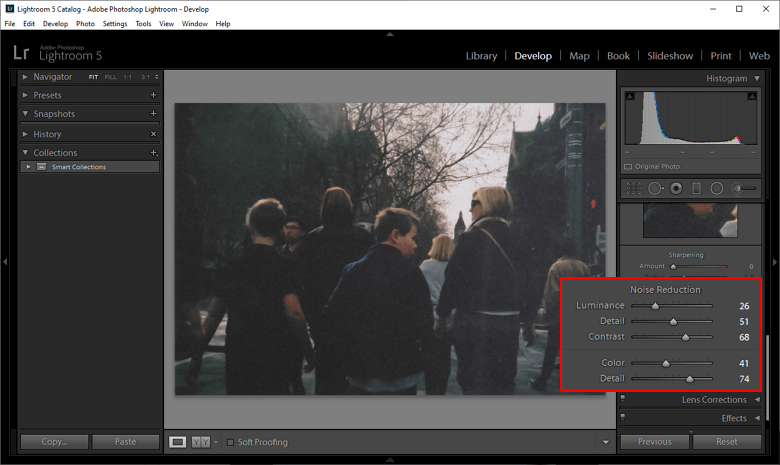
Get rid of the noise by dragging sliders of the Noise Reduction menu
Step 3. Perform Output Sharpening in the Export Dialog Box
After you remove high ISO noise, you may see a decrease in detail. Output sharpening will recover some of the crisp edges you are missing.
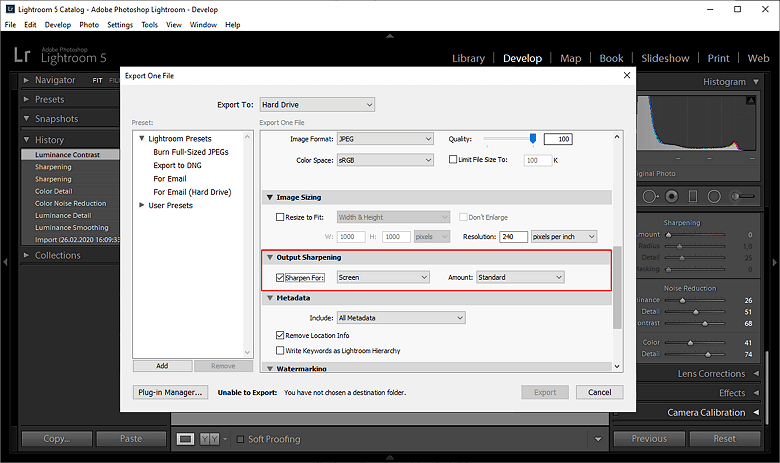
Use Output Sharpening to restore lost detail
Way 3. How to Reduce Noise in Photoshop Like a Pro
Pro photo editors who have Photoshop in their budget may not mind a more complex route to noise reduction. Although Photoshop is a much bigger program with a less user-friendly interface than the previous two, it's still possible to remove graininess from photos in just a few steps.
Step 1. Import Your Image into Photoshop
Go to File > Open to find your image and open it for editing.
Launch Photoshop on your computer
Step 2. Turn Your Main Layer into a Smart Object
Layer > Smart Objects > Convert to Smart Object allows you to revisit your filter changes later.
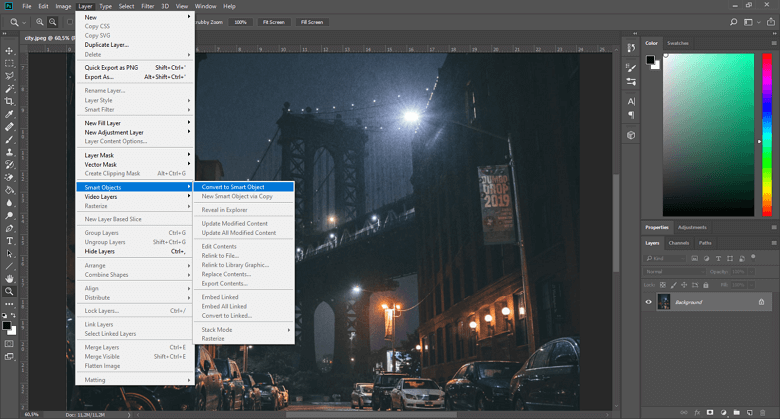
Convert your main layer into a Smart Object
Step 3. Remove Grain Using a Reduce Noise Filter
Select Filter > Noise > Reduce Noise and adjust the strength and detail of the effect, reducing the amount of ISO noise in your image.
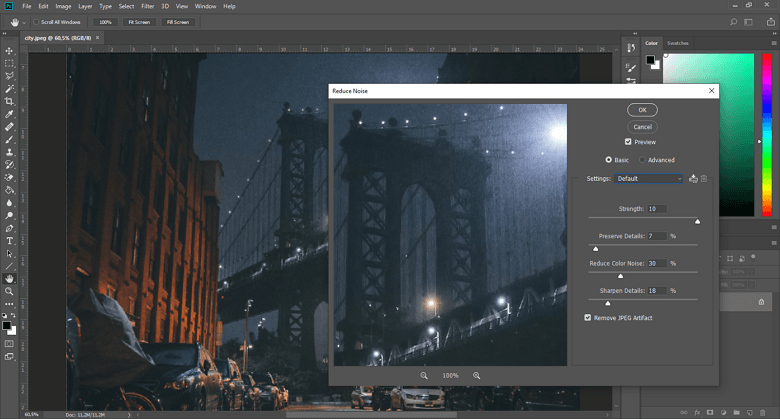
Navigate to the Reduce Noise menu to defuzz your picture
Don't want to fiddle with a zillion of buttons and sliders in Lightroom or Photoshop? Get started with PhotoWorks and give your grainy picture a smoother look with a single drag of the slider.
Way 4. Clean Up Digital Noise Using Online Apps
Sometimes you just want to make a quick fix online! Enhance.Pho.To is a web-based service that allows you to fine-tune images with a series of checkboxes. Just check options that give you the look you like and ignore the ones that don't. The result? Fast noise removing, combined with quick changes to lighting, saturation, and more. Once you are done editing, make use of their easy image hosting for a smooth sharing experience.

Use a web-based application to get rid of any digital noise
Way 5. Fix Your Grainy Images on a Mobile Device
Want your images to go straight from your phone to social media? Learn how to make photos less grainy right there on your mobile device, using Photo Noise Reducer Pro. Try a one-tap approach to view different levels of high ISO nr or create a custom effect, it's up to you! See a before and after view as you prepare to upload your photo, all from the exact same device you used to take the pic!
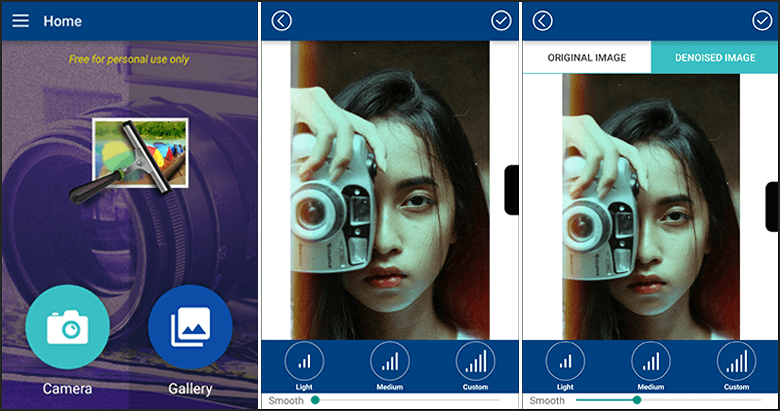
Remove grain from your photos right on your smartphone
Grainy pictures are no match for the powerful noise reduction possibilities available today. Whether you're a high-demand pro photographer who will only settle for an industry standard or a smartphone-savvy amateur, you can learn how to fix a grainy photo without signing up for expensive classes!
Not sure which option is right for you? Go with the best value. PhotoWorks combines powerful editing tools like Adobe's with an affordable pricing model and intuitive interface. Eliminating noise in photography will not only be cost-efficient, but will also be easy to accomplish and look fantastic!