How to Resize an Image Without Losing Quality

Photographers, webmasters, bloggers, and regular users often need to resize digital photos. You might want to make an image smaller, so that your website loads faster, or you may have to make an image bigger to fit it into some layout. In any case, it is better to do picture scaling with minimum quality loss, which is a tricky task. If your image resizing software uses an ineffective algorithm, the quality of the resulting image can disappoint you. So, how to resize an image without losing quality? Fortunately, today there are plenty of programs and online tools that help you enlarge or reduce a photo and still preserve its quality.
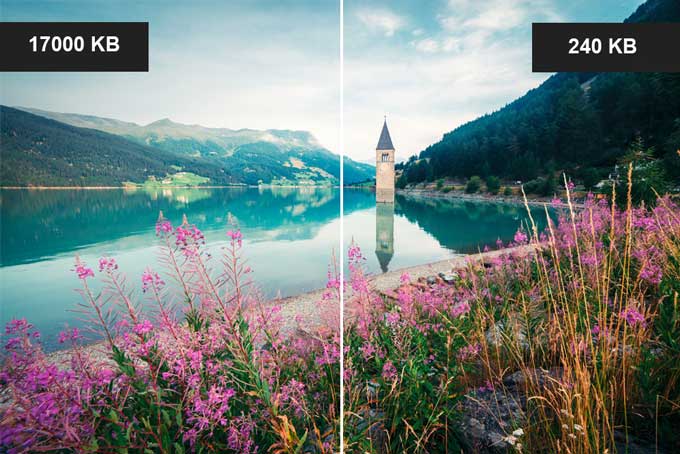
Want to resize your image without making it blurry or pixelated?
Get an easy but effective image resizer with rich image editing features!
1. What is image scaling and how it works?
2. How to resize an image on Windows
3. How to change image size in Photoshop
4. How to perform image resizing on Mac
5. How to reduce or enlarge an image online
6. How to change photo size in a mobile app
7. Drawing the bottom line
Keep on reading this guide and you will learn what methods and algorithms work best to resize an image and keep high quality. What's more, you will get acquainted with 5 excellent resizers for different operating systems. Detailed instructions and screenshots will help you sort out the resizing process in no time!
What Is Image Scaling and How It Works?
Let's begin with digital image basics. First, you shouldn't confuse resizing and cropping. When you crop an image, you simply cut out its part. If you resize (reduce or enlarge) an image, you just change its factual size and the number of pixels, while keeping all the visual information.
Logos and other vector images can be scaled up or down without any harm. But bitmap images, such as photos, should be resized with the help of advanced algorithms to keep fine details and avoid blurriness. Image quality also depends on the format: JPEG is a lossy one that can drastically shrink the picture size. On the contrary, PNG uses a lossless compression algorithm, so the resulting file size is bigger.
If you need to reduce the image size, you can use one of the three methods:
- Lower the resolution of a photo (reduce the number of pixels)
- Reduce its quality using interpolation (color change)
- Combine the first two methods
There are three most popular algorithms of interpolation:
Nearest neighbor. It uses only the value of the nearest pixel to calculate the color of a certain point. The processing speed is high, but color fidelity leaves much to be desired.
Bilinear. It calculates the average value of 4 pixels around a certain point. The resulting quality is higher, but the image can lose in saturation and fine details.
Bicubic interpolation. It is the most effective algorithm, which calculates the color on the basis of 16 nearest pixels. You get a sharpened image that is very close to the original one.
There are other image scaling algorithms, but we won't describe them here, because most resizing tools use the three ones we've just listed. The best programs use bicubic interpolation to achieve maximum quality and clarity of the resulting image. Let's take a closer look at them, so that you could choose the perfect tool for your needs.
How to Resize an Image on Windows
Need to resize an image quickly and easily? Try PhotoWorks, a smart photo editor. This image resizer features several resizing presets that offer optimal dimensions and settings for your purpose (social sharing, an HD photo movie, etc.). Your images won't get all fuzzy and blurred even after significant reduction.
Step 1. Open the Image in PhotoWorks
Launch PhotoWorks and open the image you want to resize. Before resizing, you may want to do some portrait retouching or auto correction. PhotoWorks features a lot of photo enhancement tools you will love to try.
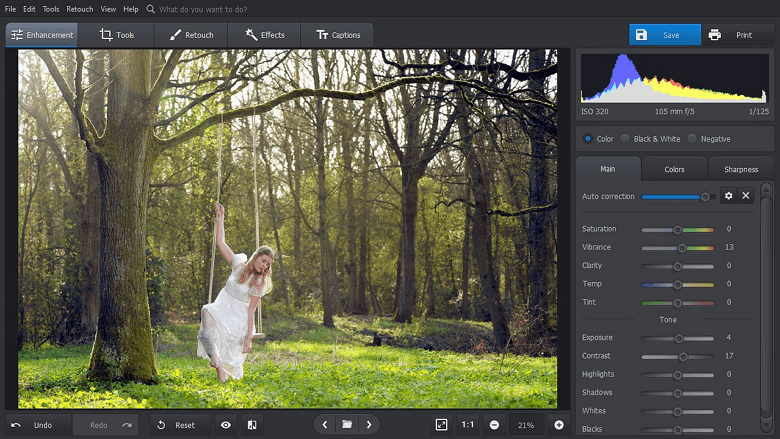
Run PhotoWorks and open the picture you want to resize
Step 2. Click File => Resize and Save
In the top bar menu click File and select Resize and Save. You will see a small dialog box where you can specify the desired dimensions or choose a resizing preset.
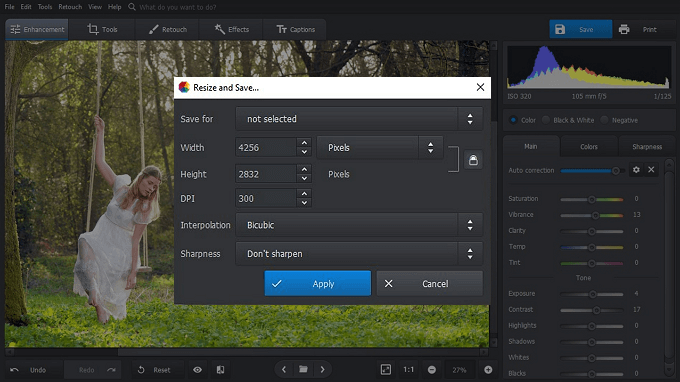
Select File => Resize and Save to open the dialog box and change the settings
Step 3. Pick a Suitable Preset
Click the first line (Save for…not selected) to see the dropdown list of presets. They offer optimal resizing parameters for different purposes: social sharing, viewing on a full HD screen, viewing on a QHD screen, etc. The settings of each preset can be customized if need be.
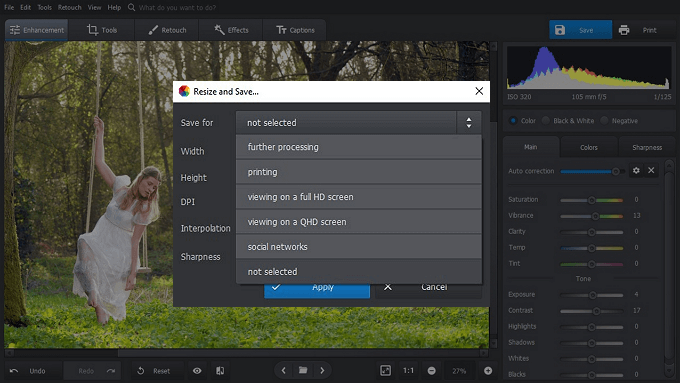
Choose one of the convenient time-saving presets
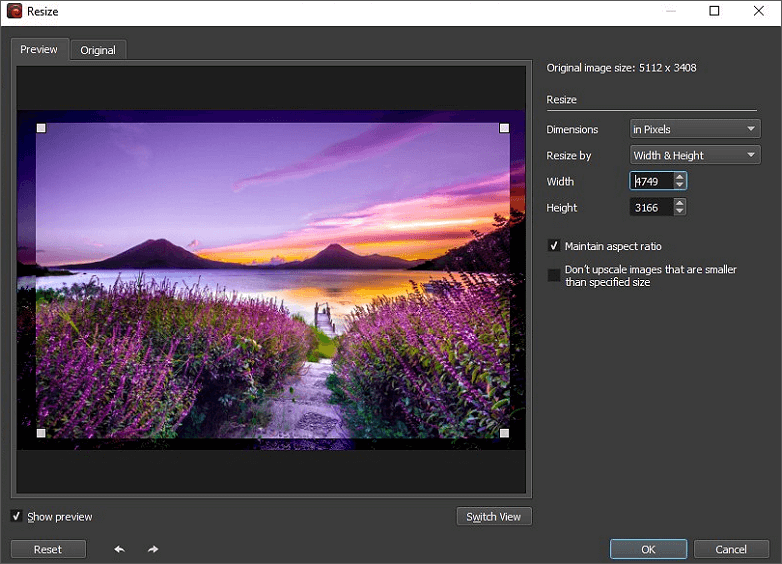
Step 4. Enter the Settings Manually
If none of the available presets works for you, it's possible to specify the dimensions and other settings manually. Type in the height and the width in the convenient units (pixels, inches, percent), enter the DPI parameter, pick the interpolation method, and the extent of sharpening.
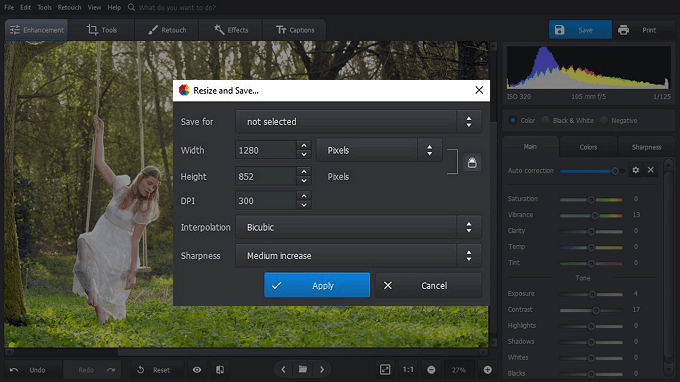
Enter the dimensions and other settings manually if none of the presets suits your needs
As you can see, the whole process is extremely quick and clear with PhotoWorks. In the end, you'll get a picture that looks exactly the same but won't affect the load speed of your website.
Click the button below and download PhotoWorks for free
to resize your pics without losing quality!
How to Change Image Size in Photoshop
Photoshop is probably the most well-known graphic editor of today, but it's a viable option for those who have considerable experience in using this program. The abundance of tools and features may be intimidating for beginners, let alone its high price. It makes no sense to buy Photoshop or other premium products (Lightroom, Illustrator) to perform such simple editing as image resizing. But if you already have a license or a subscription, here's a step-by-step guide for you.
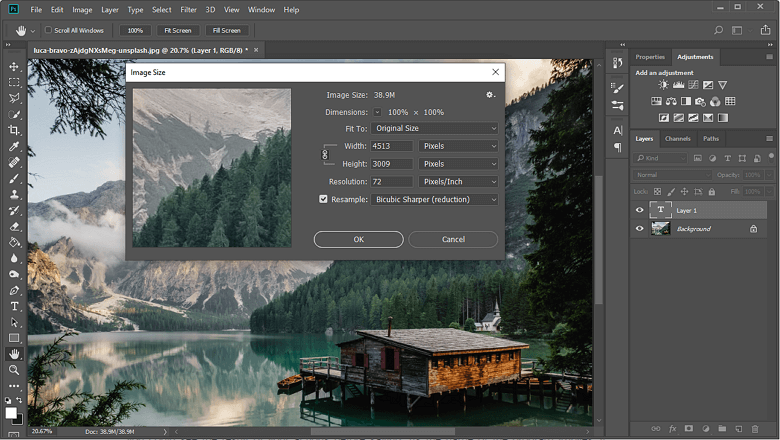
Step 1. Open the Picture and Select Image Size
Open the picture you need to resize in Photoshop and click Image in the top bar menu. You will see a dropdown list of options. Select Image Size to open a dialog box with resizing settings.
Open the photo you want to resize and click Image => Image Size
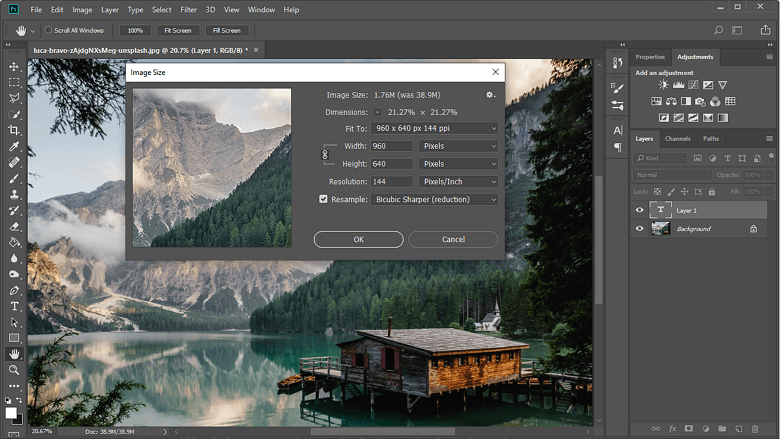
Step 2. Specify the Desired Dimensions
Enter the height and width of the final image in pixels or other units. Change the image resolution depending on your purpose and select the resample settings.
Enter the desired dimensions and change the resolution if needed
Step 3. Save the Resized Image
Save your image in a suitable format. As you probably remember from the beginning of our article, JPG is for smaller file size and lower quality, and PNG is a lossless format for larger files.
Choose the suitable format and save your resized image
How to Perform Image Resizing on Mac
If you are a Mac user, you can resize photos without losing quality in BatchPhoto - a picture viewer with handy editing features. It offers a simple wizard with only three steps and a preview tab so that you could see the result of your actions before saving. As the name of the program implies, it supports batch editing that is convenient if you need to perform the same edits on a large number of images. Alas, BatchPhoto offers only basic editing features and doesn't work on Windows.
To resize a picture in BatchPhoto, you need to click Edit Photos. Then select Add Filter to open the full list of the supported editing actions, and find Resize in the Transform category. Enter the desired dimensions in pixels or percent and choose the output format. You are done!
You can resize images one-by-one or a whole folder at once in BatchPhoto
How to Reduce or Enlarge an Image Online
Apart from desktop software, there is a variety of online image resizers. One of them is straightforward and convenient GIMP. To use it, you need a stable and fast Internet connection. Otherwise, you won't be able to load a large image for editing.
If you don't have any troubles with the Internet, you will find GIMP to be a very simple and convenient tool. First, you click Image and go to Scale Image in the dropdown list. Second, you enter the desired values of width and height, increase or reduce the resolution of the image. It’s also possible to choose the interpolation algorithm, but the default one (bicubic) will work just fine.
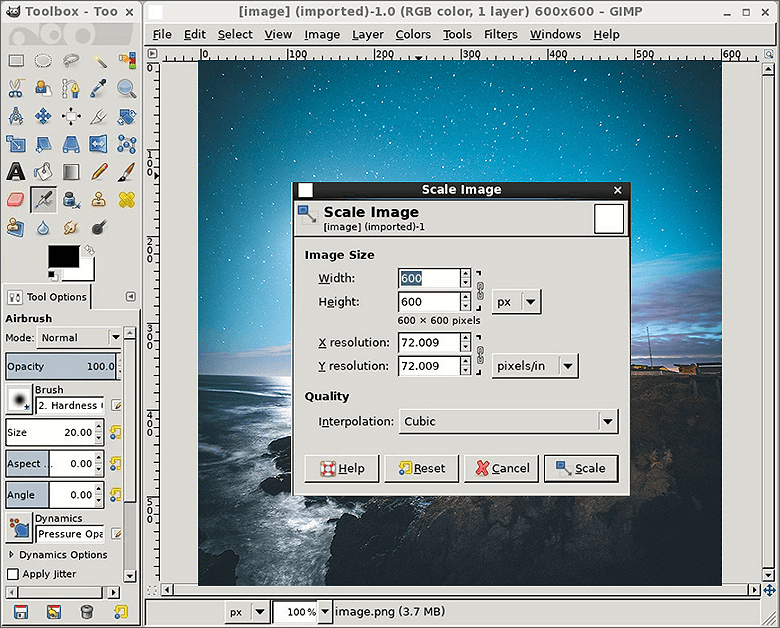
Use a web-based application to scale your picture
How to Change Photo Size in a Mobile App
Many iPhone users consider Image Size to be the best app that resizes images without distortion. It is convenient indeed, to do everything on the phone: to take pictures, resize them, and share on social media. If you have an iOS device and don't mind the absence of advanced color optimization algorithms, this app will be a decent option.
To resize a picture with Image Size, open it and enter the desired dimensions in convenient units (pixels, centimeters, inches, etc.). Then tap the Save icon, which looks like a downwards arrow.
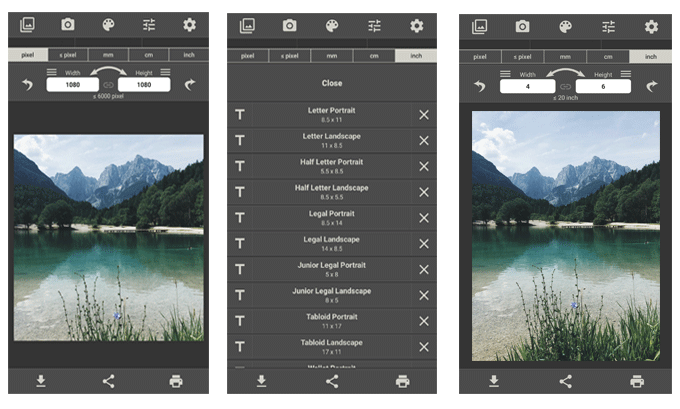
Resize any photo right on your smartphone
Bottom Line
As you can see, there is a good variety of resizing tools for any taste and budget. Image Size is perfect for those who prefer to take and edit photos on their iPhones. GIMP is probably best if you need to resize only a couple of images and don't want to install anything for that minor occasion. BatchPhoto is a good tool for bulk image resizing on Mac computers, while PhotoWorks is the best program for Windows. Apart from fast and simple image resizing, it offers loads of fancy features, such as auto photo enhancement, smart portrait retouching, RAW processing, over 180 stylish effects, and much more. Try it today and you won't switch it for any other graphic editor!