How to Do a Face Swap on PC: 7 Best Methods in 2025

 4.9
Votes: 388
(Rated: )
4.9
Votes: 388
(Rated: )
Now, why would you want to know how to swap faces? Is this for an artistic project? Or for a business presentation? All right, we get it - it's for pure, wholesome fun and some creative output, too! And as with all the things fun, swapping faces in a picture should not be difficult. With the right software, you can easily achieve it.
So how to insert a face into another picture? We'll show you 7 different ways to do that - some are easier than the others, some require a bit more of your time, but provide more seamless results. So read this guide to find the perfect way to change a face in a photo with another face. Here are the 7 methods:
Method 1. Insert a face into another picture using PhotoWorks
Method 2. Switch faces with no effort on Mac
Method 3. Replace a face in Photoshop in a few clicks
Method 4. Put a face in a picture online
Method 5. Change a face with Auto Face Swap by Microsoft
Method 6. Insert a face into a picture in GIMP
Method 7. Change a face with a deepfake photo editor
Let's take a closer look at each method so that you could decide which one of them should be your go-to choice. Here we go!
Way 1. Insert a Face into Another Picture on Windows
Looking for software that is both easy-to-use and powerful enough to rival some industry giants? Well, you've found it! PhotoWorks is a smart photo editor for PC that is packed with efficient tools for pro-level photo editing. But at the same time it manages to be quite user-friendly. Want to know how to use it to put your face on another body? We'll show you! But first let's equip you with the face changer software. Hit the button to install the lightweight photo editor on your computer for free and follow the simple steps below.
Step 1. Pick the Change Background Tool
Open the picture with the face you want to cut out. Move to the Tools tab and pick the Change Background tool.
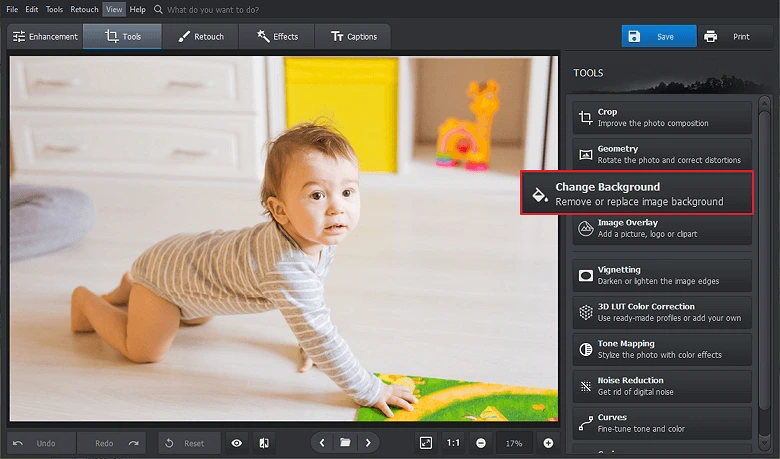
Open your picture with PhotoWorks and select Change Background
Step 2. Draw a Selection Around the Face
Use the green brush to mark the face in the picture. You don't have to be too precise - a few broad strokes will do.
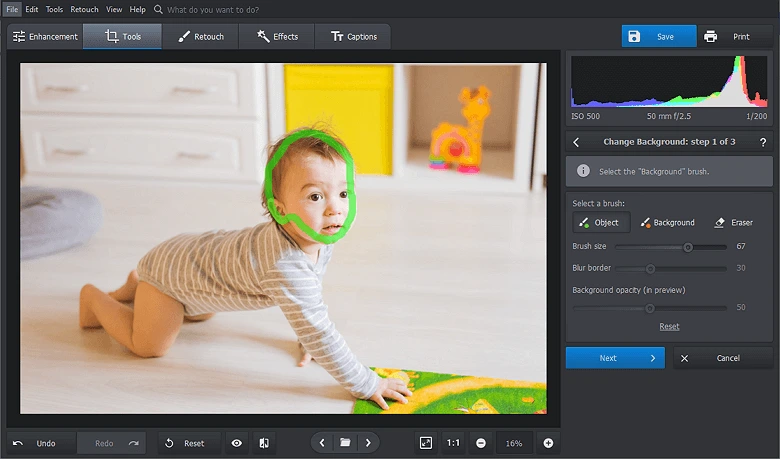
Mark the face in the picture with the green brush
Step 3. Mark the Background to Erase It
Now, use the red brush to mark the part of the picture you want to delete. Once you're done, PhotoWorks will automatically separate the face from the rest of the pic.
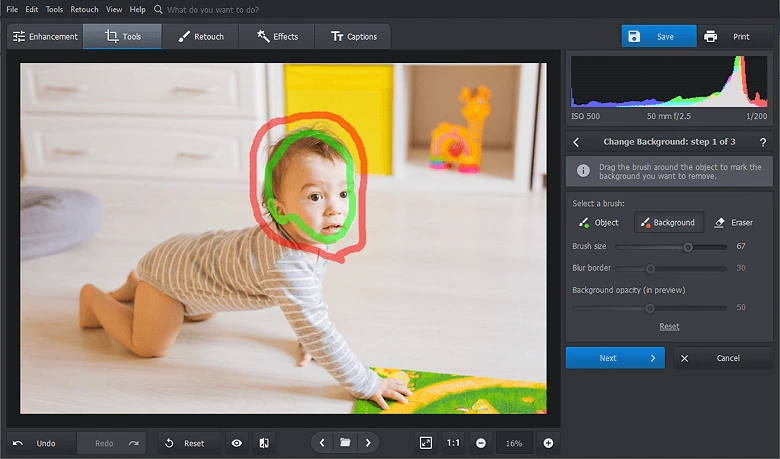
Select the part of the picture you want to erase
Step 4. Fine-Tune Your Selection
Correct your selection if necessary. Adjust the background opacity to see the missteps more clearly.
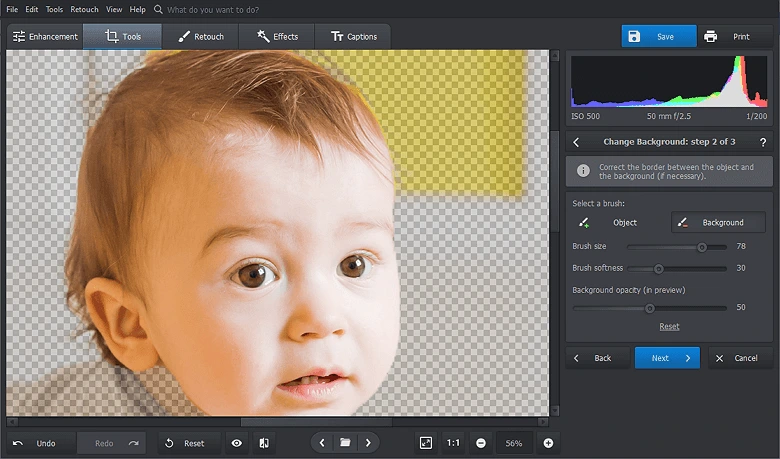
Correct any missteps in selection if necessary
Step 5. Easily Swap the Face
Now click on Select New Background and upload the picture you want to put the face on. Adjust the face layer position, size, and adapt its color to match the rest of the photo.
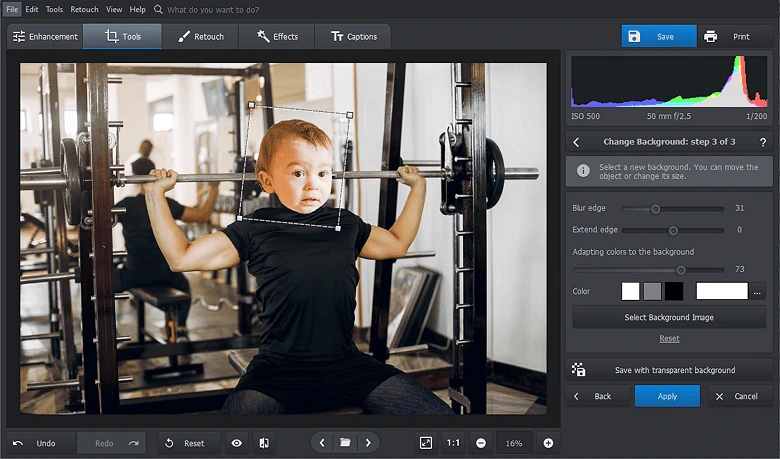
Now you have seamlessly swapped the faces
Prefer visual manuals to written ones? Then watch this short video to see how you can use PhotoWorks to superimpose your face onto a celebrity photo and turn yourself into a star in a snap:
Ready to try replacing faces with PhotoWorks?
Then start a free trial today!
So if your desire to make funny content is grand, but your photo editing skills are modest, then PhotoWorks is definitely for you - this smart face switching app is refreshingly easy to use. At the same time it's filled with efficient tools that can help you fix the color balance of your pic, retouch your portraits in a click, remove odd objects in the background, add a frame to a picture, stylize your images with filters and 3D LUT presets, and so much more.
Way 2. Switch Faces with No Effort on Your Mac
Are you a proud Mac user? Then you might be familiar with Pixelmator. Some might call it a poor man's Photoshop, but this program is a powerful image and graphic editor in its own right. Jam-packed with tools for cropping, retouching, color grading, Pixelmator is responsive and user-friendly. Let's see if it's going to be difficult to put someone's face on another body with this Mac app.
Step1. Open Your Picture
Start Pixelmator and open your picture with the face you want to cut out.
![]()
Open the picture with the face in Pixelmator
Step 2. Trace the Face with the Lasso Tool
To change a face in a photo with another face, you'll need to use the Lasso tool - draw a selection around the face, refine the selection, then copy and paste it into a new layer.
![]()
Select the face with the Lasso tool
Step 3. Open the Other Picture
Now open the picture to put the new face on. It's better to choose a picture where the face you want to replace is roughly at the same angle as the new one.
![]()
Open the picture you want to paste the face on
Step 4. Do the Face Swap
Drag the layer with the face onto the other picture. Adjust the layer position. And it's done!
![]()
Swap the faces on the picture
Well, that seemed to take a bit more time, and careful manual selection is probably to blame (and fiddling with layers didn't help either). But all in all, it's clear that Pixelmator is still capable of showing impressive editing stunts. The program is cheaper than the almighty Photoshop, but there are certainly more affordable softwares with a similar functionality out there (that also run on more than just one system).
Way 3. Replace a Face in Photoshop in a Few Clicks
You knew this one was coming. Photoshop is so popular, powerful, and versatile, that this program has become the staple of photo editing software. But it also has gained the reputation of a program that is insanely hard to grasp as well as really pricey. But there is no avoiding Photoshop, so let's learn how to put your face on a different body with it.
Step 1. Open Your Pictures with Photoshop
First, start PhotoShop, then open both pictures - the one with the face, and the one you want to paste this face onto.
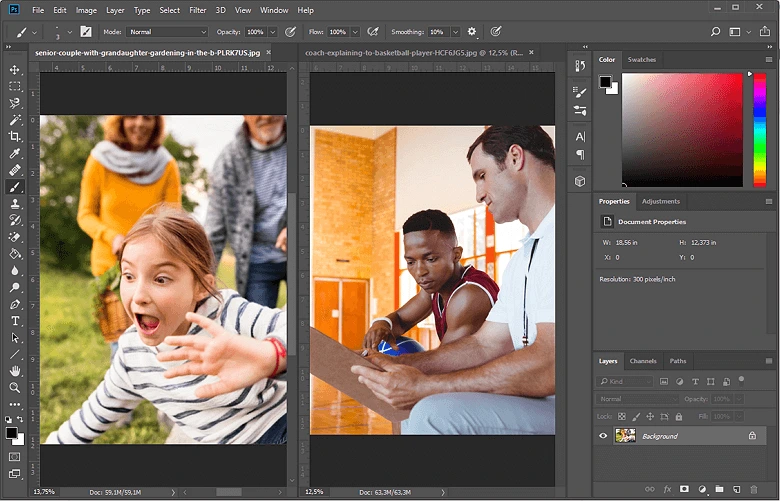
Open both pictures with Photoshop
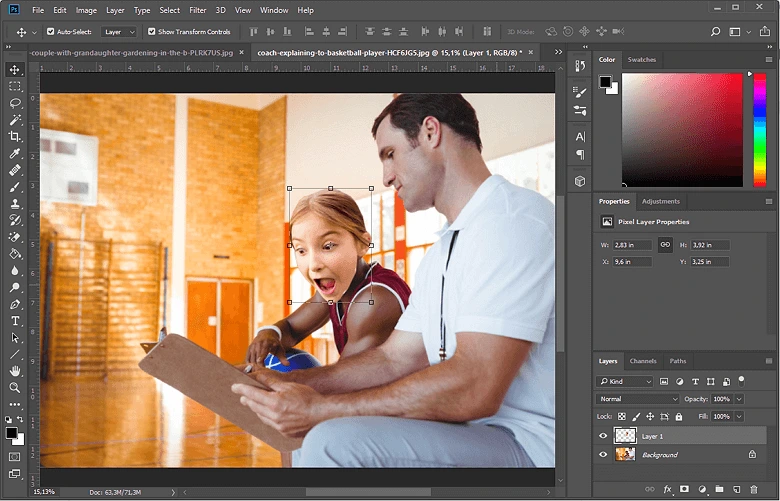
Step 2. Select the Face with the Lasso Tool
Select the Lasso tool and draw a selection around the face. Correct any missteps by pressing Shift to add some area, or Alt to deselect it.
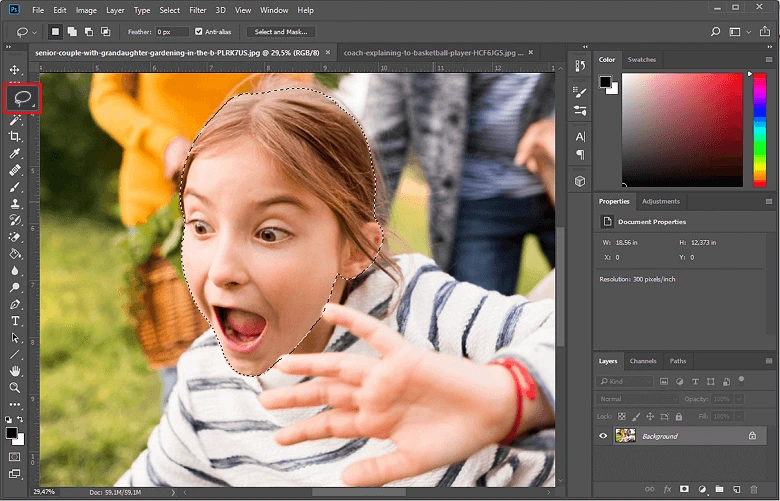
Use the Lasso tool to draw a selection around the face
Step 3. Add the Face to a Photo
Now copy the selection by pressing Ctrl+C, then insert the face into the picture with Ctrl+V. Use the Move tool to position the layer on top of the face you want to swap.
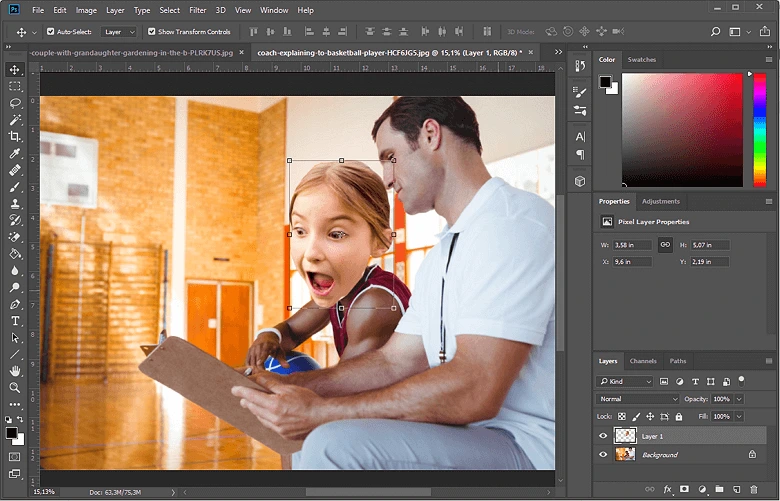
Copy and paste the face layer onto another picture
Step 4. Resize the Face Layer
Press Ctrl+T to resize the upper layer so that the head is proportional to the body. Right click your selection and choose Warp to slightly tweak the upper face for a seamless replacement.
Resize and slightly warp the face for a perfect blend
Well, that was quite an exercise in photo editing, but the result is stunning. But was it worth your time? Yes, admittedly, with Photoshop, you can do virtually anything to your pic, from simple enhancing to turning it into a work of graphic art. But, also admittedly, this software is torturously difficult and quite costly. We are not advising against it, but if your time is valuable or your skills are not that great, Photoshop might not be for you.
Way 4. Put a Face in a Picture Online
Don't have a desktop photo editor at hand? Then you can find solution online! For example, PicMonkey, a web-based photo editor. With it, you can easily edit photos, retouch portraits, and create awesome looking designs. Let us see if PicMonkey can be used to switch faces in pictures.
Step 1. Convert Your Picture to a Layer
Upload your photo for a face swap into Picmonkey. Click the Layers button at the bottom and convert your picture to a layer.
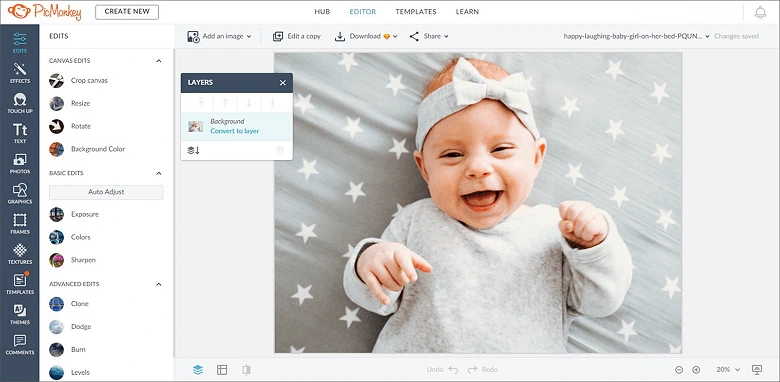
Open PicMonkey and upload the picture with the face to it
Step 2. Erase Everything Around the Face
Switch to the Erase tab of the Graphics palette on your right. Use the Eraser tool to remove everything around the face.

Remove the area around the face
Step 3. Open the Second Picture
Now click Create New to open the picture you want to put the new face on. Don't worry, you won't lose your previous selection, as it will be saved in the Hub.
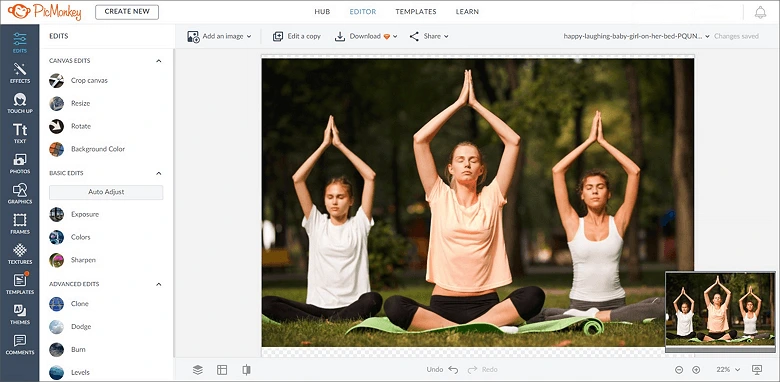
Open your second picture with PicMonkey
Step 4. Replace the Face in the Photo
Open the selection file and place the new face atop the old one. Resize the layer so that the face and the body match the size. Then, flatten the two layers and save your picture.
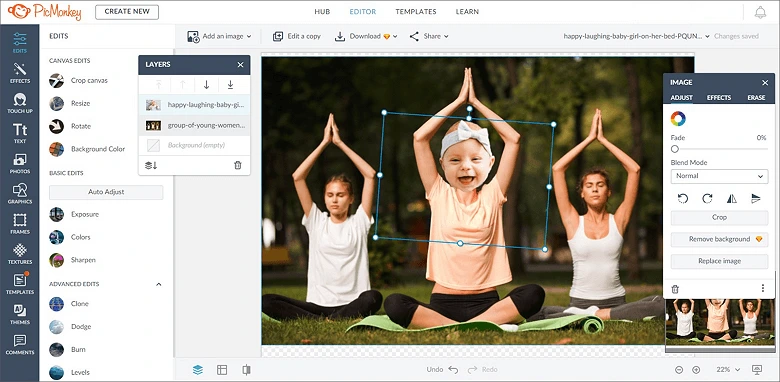
Paste the new face on top of the old one
It wasn't all that difficult, was it? PicMonkey truly earns its reputation of a popular and powerful online image editor. But this whole online thing could be its greatest drawback. For starters, you're putting yourself at risk of an unpleasant privacy breach whenever you upload your picture to the Net. Besides, you need a stable Internet connection on your computer to get the software up and running at all. So if those factors are not a issue for you, then make sure to check PicMonkey!
Way 5. Change a Face with Auto Face Swap by Microsoft
Oh, all this fiddling with selection and whatnot! If only there was a way to swap faces automatically… There is! There are, in fact, many softwares that can do it in a click. Curious to see? Then let's try to face swap pictures with Auto Face Swap by Microsoft.
Step 1. Open Your Picture in the Software
Open your picture with Auto Face Swap. For a better result, choose face swap pictures where people's heads are at the same angle and look straight at the camera.
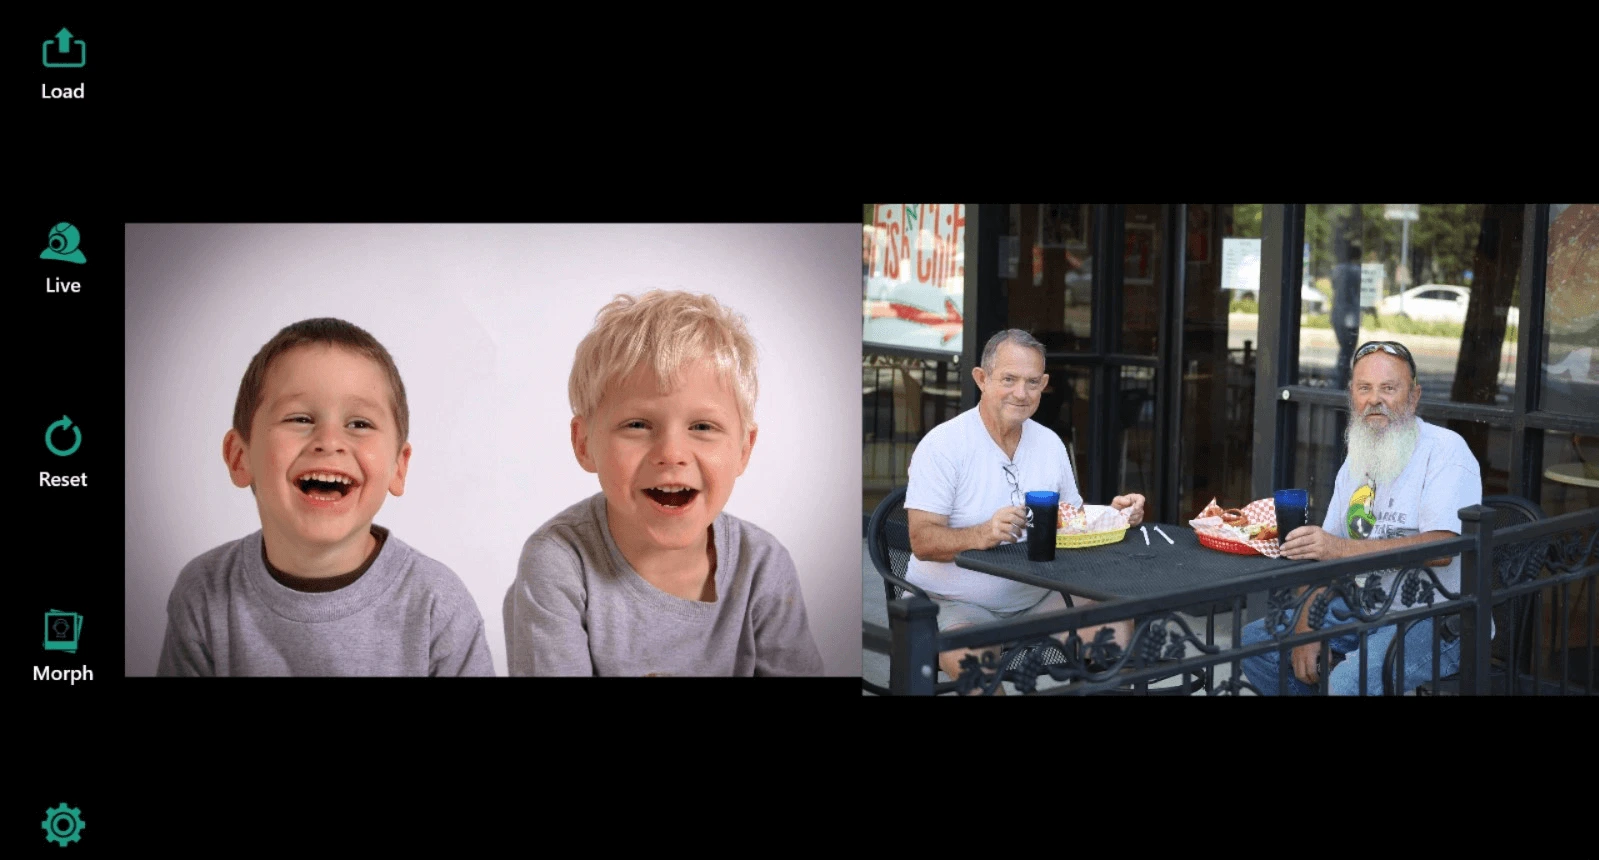
Open your picture with Auto Face Swap
Step 2. Pick the Swap Mode
Click the Option icon. You can either choose Copy to just replace one face onto another. Or you can go with Swap, which means that both faces will be swapped. Let's go with this one.
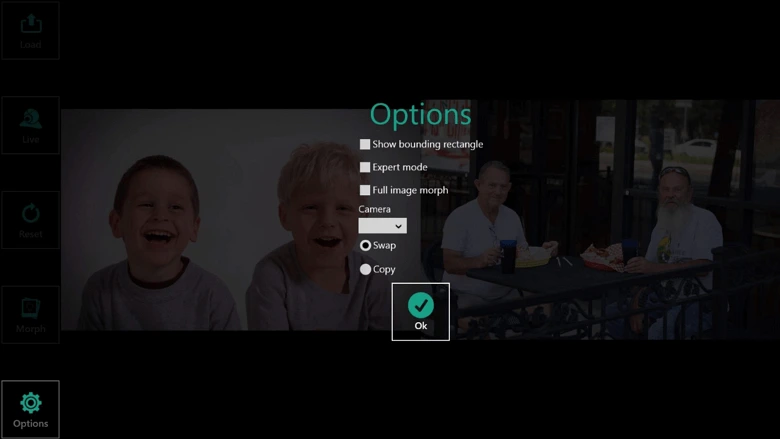
Select the Swap Mode
Step 3. Switch Faces in the Picture
Now, just drag and drop one face on top of the other. The software will replace the old face by automatically inserting the new one on top of it.

Swap the faces in a flash
Step 4. Save Your Montage
Left click the picture and choose Save option for the drop-down menu. Now go troll your friends with your creation.
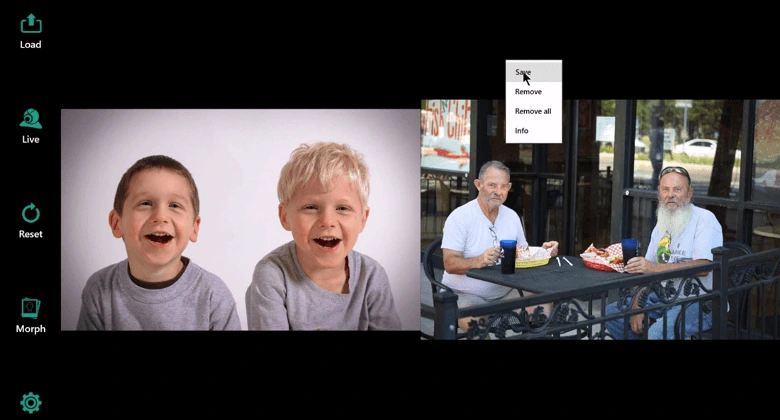
Save the face swapping result
Swish-swish, and there you go - a new face in the picture. Automatic applications like Auto Face Swap are real timesavers and just perfect for those who aren't that familiar with photo editing. However, in this program by Microsoft, face swap is fully automated and there is no control over the effect, so you won't be able to edit the face swap if it falls flat.
Auto Face Swap is a cross-platform application, so if you are looking for a face swapper for you mobile phone, whether iOS or Android-based, then this software is worth checking out.
Way 6. Use the Free Face Swap App for PC
Want to learn how to put a face on another body without Photoshop and other expensive programs? Get yourself GIMP. It's a powerful face changer for PC and a worthy Photoshop alternative since it offers similar functionality. However, the cluttered interface and the complicated plugin system might intimidate even experienced users. Don't mind the complexity or have experience with similar editors? Then read on to explore how to add faces to pictures free of charge with this mighty editor.
Step 1. Upload the Pictures
First, import your files and open the photo with the face you want to copy. Click on Tools and pick the Paths tool.
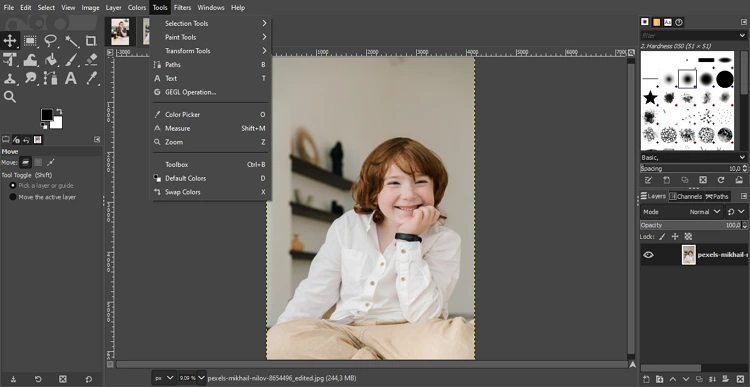
We’re going to copy and paste the boy’s face into another pic
Step 2. Select the Object
Once you choose the selection tool, left-click around the desired area to mark the face. Keep tracing till you get back to the starting point.
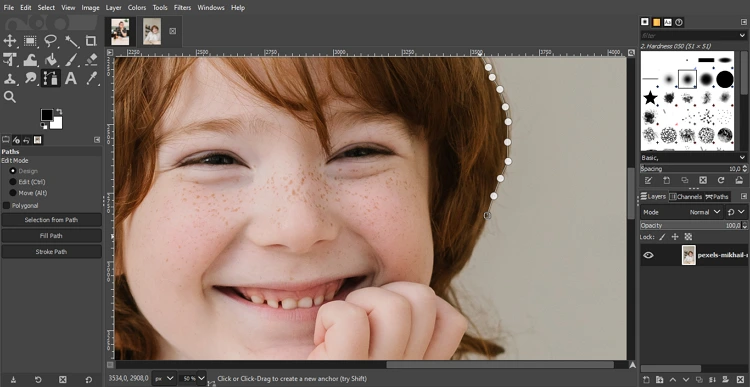
Mark the face area with the Paths tool
Step 3. Paste the Copied Face
To insert the marked section, hit Selection from Path, press Ctrl+C, open the larger photo, and add the face by pressing Ctrl+V.
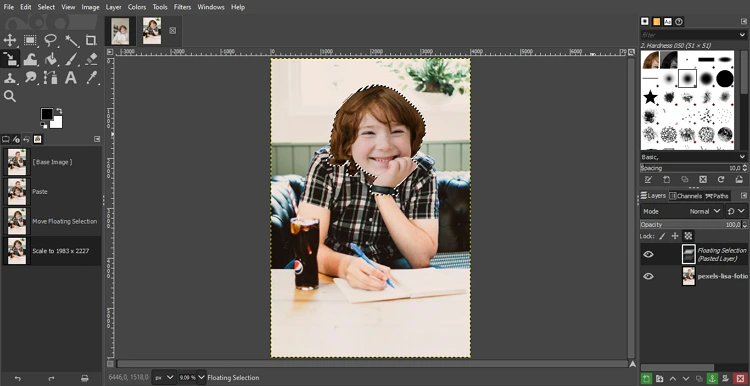
Glue the new face onto the photo
So how did it go? If everything worked smoothly, enhance your image further with other helpful features of this face swap software for PC - resize the photo, adjust the color tones, add layer masks, etc. But if you feel it takes too much time to photoshop a face on a picture in GIMP, try an easier alternative from our list.
Way 7. Change Your Pics and Vids in the Deepfake Photo Editor
Want to take face swapping to a new level? Try using the magic of artificial intelligence. With sophisticated algorithms and deep learning, an AI accurately detects and tracks facial features for a seamless face replacement. You can perform such a task using web-based AI face swap tools like Deepswap, Icons8 Face Swapper, and Pixble. If you prefer desktop programs, opt for Faceswap, a deepfake software for Windows and Linux. This free face swap app creates realistic videos with new faces using neural networks. It’s not that difficult to use Faceswap, just follow our lead and enjoy the classy results.
Step 1. Add Your Videos
For starters, extract the faces from the footage - add the video with the person whose face you’re going to replace as Input Dir. The program will take screenshots of different facial expressions and save them in the folder you select as Output Dir. Then create another folder and repeat the steps with the second video to extract the face you want to apply.
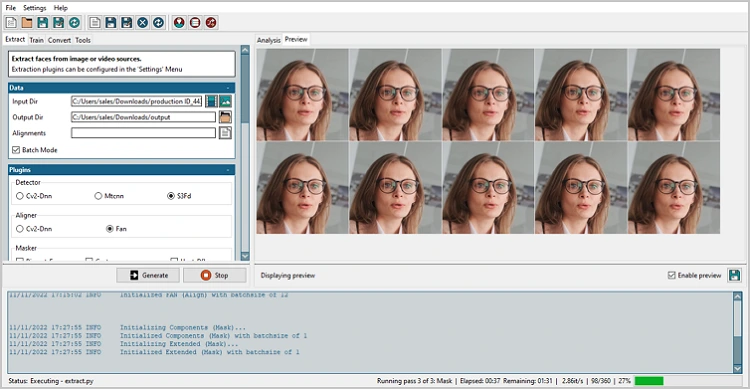
The program identifies facial expressions in the imported video
Step 2. Adjust the Face Swap Folders
To create a natural-looking face swap on your PC, train the app in face replacement first. Go to the Train tab, select the folder with the first video screenshots as Input A, and set the other folder as Input B. Now make a directory for generating the new face and set it as Model Dir. Then adjust the Timelapse - choose the folders with the original photos, create a new Output folder. Now click Train to start the training session. It might take hours or even days depending on the length of the video.
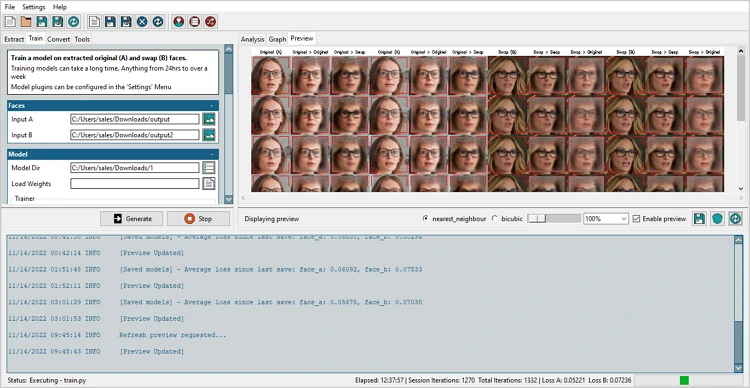
Stop the session when you’re happy with the results displayed in the preview
Step 3. Complete Face Swapping
Once the training process is over, open the Convert tab. Set the first video as Input Dir and the new video - as Model Dir. Finally, hit Convert to finish the face replacement in this deepfake photo editor.
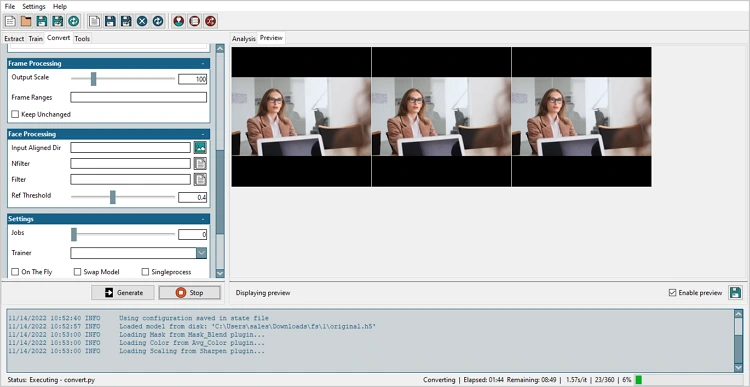
Wait till the video with the swapped face gets loaded
The program’s automatic tools make the face swap for PC especially simple. Besides, Faceswap allows you to create deepfake images and videos for free. Still, you will have to go through a long process of trial and error to figure out how this photo face change software works.
Now you know 7 ways to swap faces in a picture. Some swap makers are easy as pie and do quite decent job, while others require some skill and dedication, but grant you a jaw-dropping effect. If you are looking for something in between, then go with PhotoWorks. This software finds the balance between an easy approach and a pro-level result. All of this makes PhotoWorks simply one of the best face swap software for PC.
FAQ on Face Swapping
First, open the picture with the head you want to cut out and select the face either with the Lasso or Quick Selection tool. Then, copy the layer and paste it onto the picture with the new body. Resize and rotate the face layer so that it matches the bottom picture.
If you need an app for quick and easy face swapping, you should consider Auto Face Swap by Microsoft. Its name speaks for itself - this software can change or copy faces in the picture automatically, no manual selection is required. With Auto Face Swap, you can even morph two faces into one.
If you don’t want to fiddle with meticulous selections, isolate the face with an AI-driven photo editor. Select the face with a brushstroke and delete the rest of the photo. Next, you need to copy the face layer and paste it onto the bottom picture. Then, position the layer over the new body. Resize and rotate the head so that it matches the rest of the pic.
Use PhotoWorks to edit pictures with precision!