How to Make a Calendar in Photoshop: Comprehensive Guide

Have you ever looked at a store-bought calendar and wished it had your family or vacation picture? Guess what - this can be a reality. You are more than capable of making a personalized calendar. And what better software to use than the almighty Photoshop - a highly acclaimed program for photo editing and graphic design. Don't quite know how to use it for your cause? Not a problem! In this article, we'll show you how to design a calendar in Photoshop. Ready to make a wonderful time management tool and a great piece of home or office decor? Then let's get rolling.
How to Create a Calendar in Photoshop Step By Step
Photoshop isn't only good for retouching faces and bodies into perfection or creating groundbreaking imagery. This software is perfectly capable of such mundane tasks as calendar making. Let's have a look at how you can create a calendar with a background image in this program. We'll be using Photoshop CC for the task, but you can use an older version - or even Photoshop Elements - with the same result.
- Step 1. First, you need to create a new file. Set the size of your calendar and change the color mode to CMYK since we'll be printing your project later. Next, open the image that will serve as the background for your calendar. Select and copy it, then paste it to your new file. Resize and move the image if needed. By the way, if you are struggling with the idea for your project, have a little peek at how to make your own photo calendars, just for the sake of inspiration.
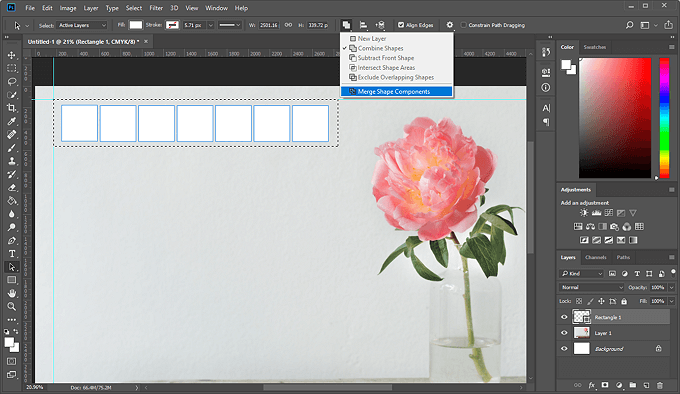
- Step 2. Now let's create a table in Photoshop. Pick the Rectangle tool, set a color for it (we'll go with white), then draw a square. Pick the Path Selection tool, highlight the square, hold Alt and drag this shape to the right. You'll make a copy of it, while the original square will be intact. Do this five more times so that you have seven squares in a row. Just make sure that the distance between them is the same.
- Step 3. Pick the Selection tool and select the square row. Now go back to the Path Selection tool to merge the shape components. Now the cell row is a single shape. To make your calendar look more refined, lower the opacity of the cells.
- Step 4. Your next step is to create five more rows - once again, hold Alt and drag them down till you have a grid that is seven squares wide and six squares high. Finally, once again merge all the shape components together. This is how you make a table in Photoshop.
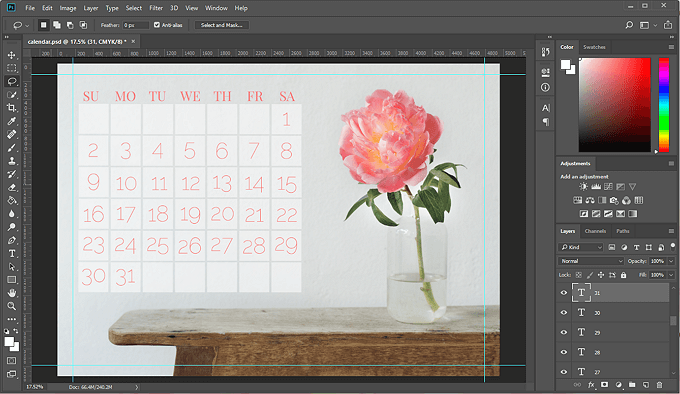
- Step 5. Type in the names of the days. Pick the Type tool and type in Su, set the size, font and color, then place it over the top left square. Repeat similar actions for all the week days. Now type in the numbers of days, pick the style for them, then place them all in the corresponding cells. If you are making a family birthday calendar, mark the big days in a different color.
- Step 6. Once again pick the Rectangle tool and draw a shape for the month header. You can fill the shape with color, gradient, or pattern; change its opacity - whatever the aesthetics of your calendar demands. Finally, type in the name of the month and pick a style for it.
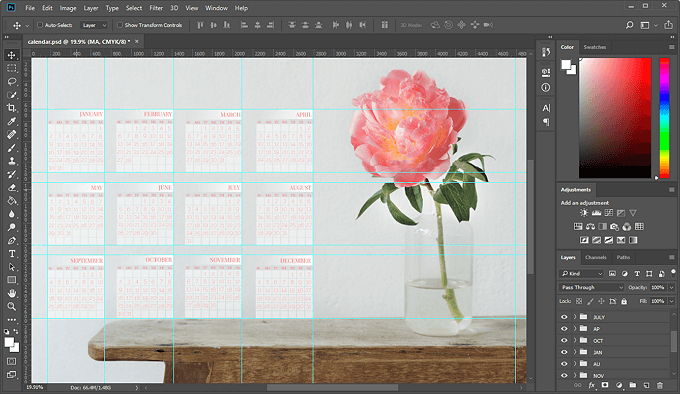
- Step 7. Now that you have the first month grid done, select all the layers that incorporate it and press Ctrl+G. This action will group all the layers for your convenience. Now drag the cell to the desired spot. Click Ctrl+T to resize it (make sure to hold Shift while you do it so that the grid keeps its proportions).
- Step 8. Copy and insert 11 tables for the remaining months. Adjust the day numbers and month names accordingly. Change the size and position of all the month grids. Once again use ruler guidelines to make the grid even.
- Step 9. Finally, add the year. Use the Type tool to type in the number, pick a style for it and place it where it would look best. You can also add an inspirational quote that would be cheering you the whole year long.
- Step 10. Make sure to click Merge visible to secure all the elements in place. Now you can save your calendar as an image - in case you plan to use its digital copy. Alternatively, you can save it as a TIFF file if you plan to print it right away. And this is it!
 Make sure to use ruler guidelines to mark the working area
 It will be easier to move the cells once you merge the shapes
together
It will be easier to move the cells once you merge the shapes
together
 Make sure that the fonts you choose look good together
 Once again use guides to perfectly align all the month grids
And this is how you create a calendar in Photoshop. Although the result is rather pretty, it definitely took some time and effort. Want to find an easier way? Stick with us a little longer.
While Photoshop is definitely a top-tier program that is capable of anything, including making a
calendar, it is still a very complex and expensive piece of software. Sure, you can cut some corners by
downloading Photoshop calendar templates online, but you'll be dealing with very basic designs that you
won't be able to customize. If you are looking for a way to generate a calendar that would be uniquely yours and won't take hours
to make, then direct your attention to Photo Calendar Creator. This award-winning software is not only a
lot more affordable, but is also exceptionally easy to use. It comes with 250+ photo calendar templates
that you can personalize to your heart's content. What's more, Photo Calendar Creator has a free trial
period, so you can download this software right now and try it for yourself. This is what you'll get
access to: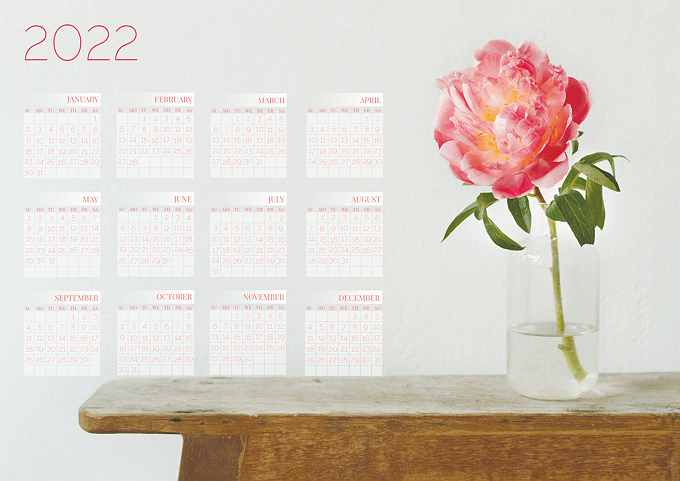 Here's our calendar created with Photoshop
A Cool Alternative to Making a Calendar in Photoshop
![]() Photo Calendar Creator
Photo Calendar Creator
![]() Photoshop
Photoshop
How to Create a Photo Calendar in Under 5 Minutes
Did Photo Calendar Creator get you hooked with its many nifty features? Let's have a look at how to use this easy calendar maker to design a calendar with your pictures and unique aesthetics.
Step 1. Pick a Template and Insert Your Photos
Run the software and choose what type of calendar you want to create. There are 250+ templates at your disposal. With them, you can make a weekly calendar, a monthly calendar, or a yearly wall calendar in just a few minutes. Once you pick a suitable template, set the size for your time tracker and starting year and month. Next, add your pictures to your project. Go with a single image or create a collage right within the program. Decorate your photos with frames, masks, and cliparts.
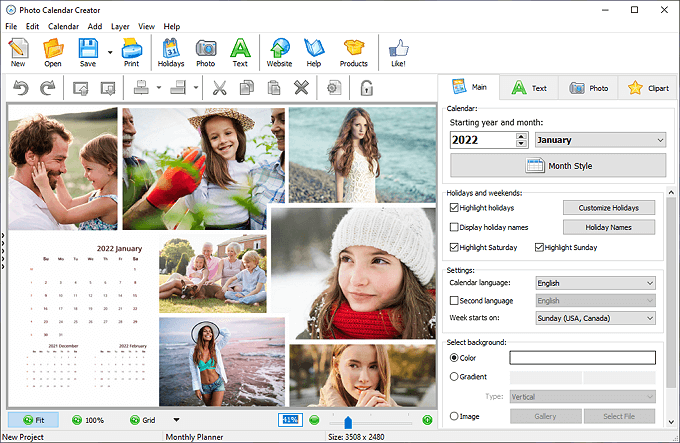 You can make calendars for school, business, or home use
Step 2. Customize the Grid and Add Holidays
Now decide on the look of your calendar grid. You can either pick a style from the predesigned options or come up with a grid of your own. Choose a new color, size and font for every aspect of the month grid. Next, create a list of your own holidays or important events - birthdays, anniversaries, sports practices, doctor appointments - and highlight them in the cells. You can even decorate these cells with photos or pictograms to make your calendar more personal.
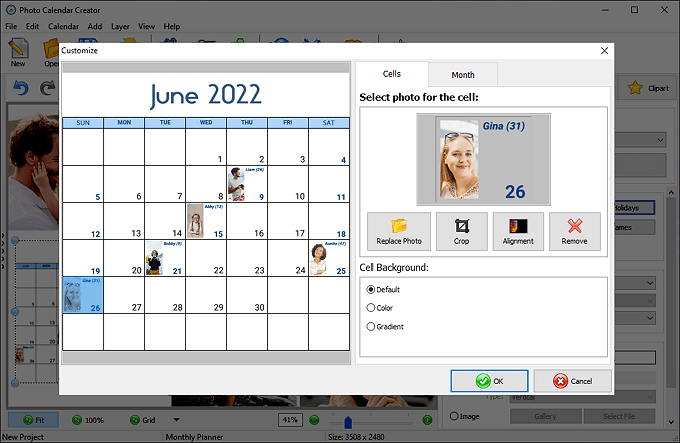 Highlight personal and national holidays to be able to plan in
advance
Highlight personal and national holidays to be able to plan in
advance
Step 3. Save and Print Your Calendar
Once your design is finished, save it as a template for later use. You can also save your project as an image to email to someone or to use it digitally. Alternatively, print your calendar right away. No matter whether your project is small or large - Photo Calendar Creator comes with a smart printing module that makes printing of any calendar type and size a one-click job.
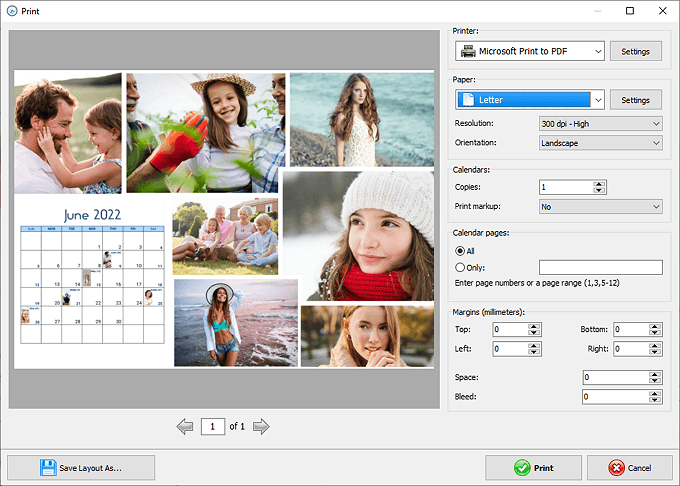 Set the resolution at 600 dpi for premium print quality
And voila - it only took us 3 simple steps to create a one-of-a-kind calendar. All thanks to the prowess of Photo Calendar Creator.
If you still want to create your own Photoshop calendar - then go ahead. Just make sure that you have mastered this software enough to make the best of it. But in case you have no desire to waste your time and money on the overly complex Photoshop, then you know what tool to use. Photo Calendar Creator hits the perfect balance of being feature-rich and intuitive. Use this software to easily create awesome calendars for any sphere of your life.