How to Blur the Edges of a Photo:
No Photoshop Required
 5.0
Votes: 3
(Rated: )
5.0
Votes: 3
(Rated: )
Want to make the edges look less harsh or create a dreamy atmosphere in your pictures? Achieve it with the edge blur! It makes the images look softer, and helps you emphasize the subject of your photo. If you want to edit a picture in such a way, read on to discover 3 best methods to get it done. You’ll learn how to blur the edges of a photo with user-friendly software for a PC and Mac, an open-source desktop photo editor, and a web-based service. Let’s take a closer look at these methods.
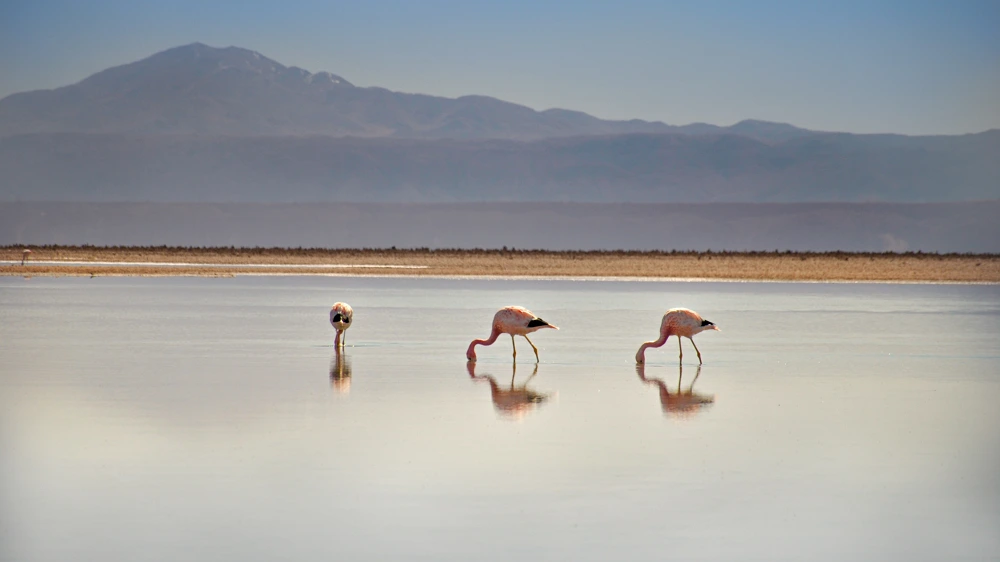
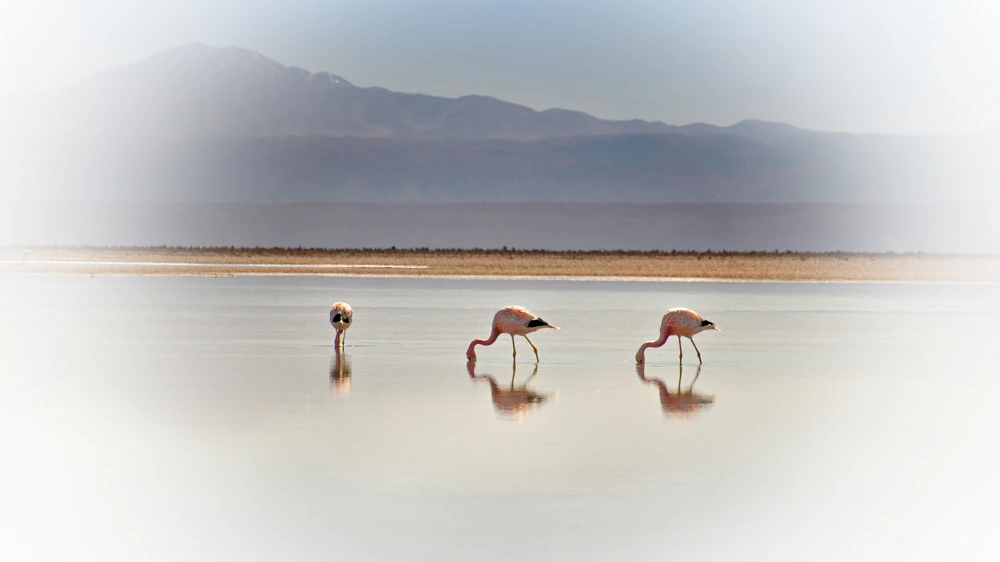
This is how you can blur the edges of your image
Need a photo editor to add blurred edges to a picture?
Try PhotoWorks for free today!
Blur image edges in PhotoWorks
Soften the photo edges with GIMP
Edit edges of a picture online
How to Blur the Edges of a Photo in PhotoWorks
To change the edges quickly and easily, try PhotoWorks, a powerful photo editor suitable for newbies and pros. With this software, you can retouch portraits, change the background, overlay images, and even remove objects in a couple of clicks. And blurring image edges is also a breeze with PhotoWorks. We'll show you 2 easy ways to do it using this program: by lightening the edges and by adding a faded border. So, let’s see which method suits you better.
Way 1. Apply a Vignette Effect
The first way to soften the image edges is by using the Vignette effect. It helps you make the border darker or lighter which gives a picture a romantic mood. To make the edges less sharp in your photos, follow these simple steps:
Step 1. Install the Photo Editor
To begin with, you need an editing program at hand to make the adjustments, so click the button below to download the installation file. Then run this file, follow the instructions of the setup wizard to install the software, and launch it.
Step 2. Import an Image
Click Open Photo to add the picture you’d like to edit. You can also import a photo by dragging and dropping a file to the startup screen.
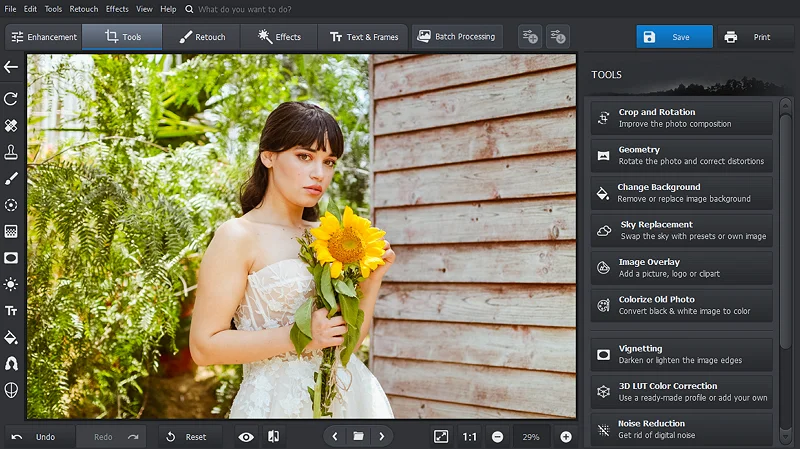
Select the picture you want to edit
Step 3. Blur the Edges
Go to the Tools tab and select Vignetting. Now, drag the Amount slider to the left to make the edges darker or to the right to lighten them. Then change the Midpoint, Roundness, and Feather values - play around with the settings till you like the result. When done, hit Apply.
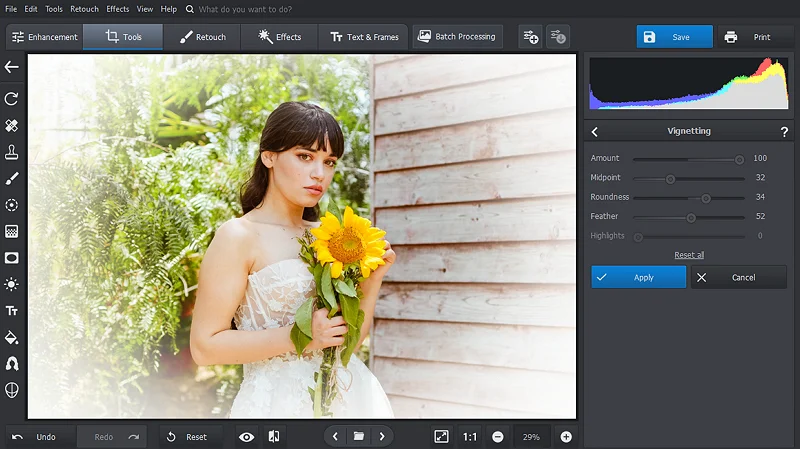
Adjust the edges to your liking
Step 4. Save the Photo
To compare the before and after, click and hold the eye icon or hit the Before / After button. If you like the way your image looks with edge blur, click Save and adjust the export settings: format, quality, destination folder, etc.
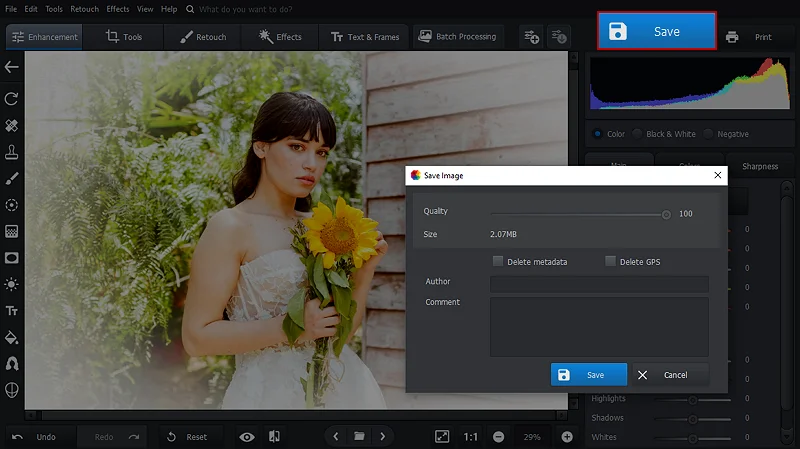
Save your image in high quality
Way 2. Create a Fade Border
Another way to edit the edges of a photo is by adding a blurred faded border. Here’s how you can achieve this effect with PhotoWorks:
Step 1. Add a Frame
In the Text & Frames tab, select Frames, choose a frame with rounded corners, pick the white color, and set the Size and Angle values. Then, click Apply.
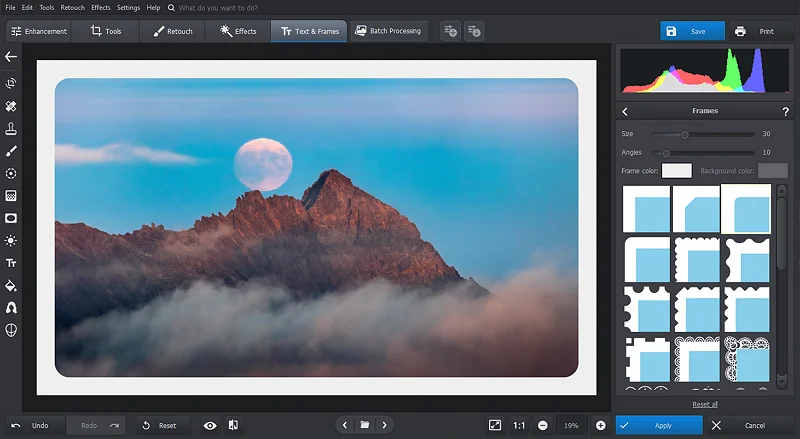
Choose a frame with rounded corners
Step 2. Select the Edges
Go to the Tools tab, choose Change Background, and paint over the photo with the Object brush and select the edges area with the Background brush. Click Next and either correct the selections or skip the step. Then hit Next.
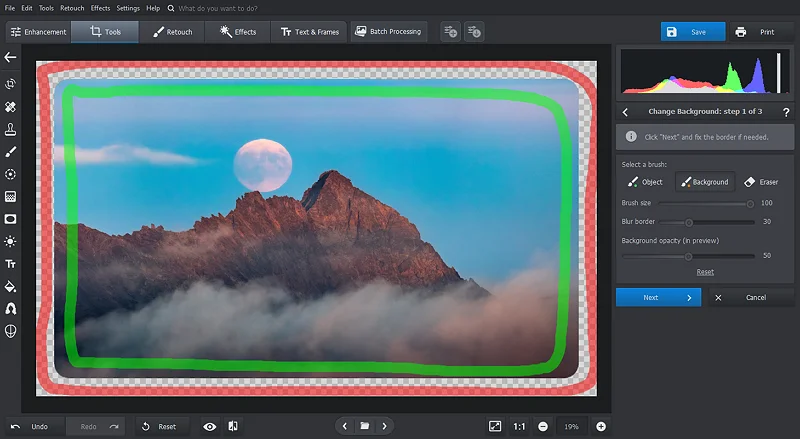
Use the brushes to select the edges
Step 3. Make the Edges Blurry
Now, increase the Blur Edge value and adjust the Extend Edge setting. Then click Save with Transparent Background to export the picture with the faded edges.
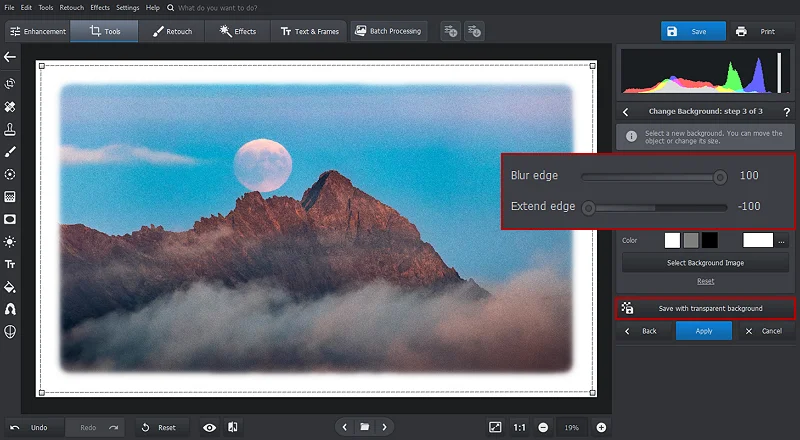
Adjust the settings for a better result
Prefer video tutorials to written instructions? Then make sure to watch the video below to see the photo editing process in action.
As you can see, giving picture edges a softer look is no big deal even for non-experienced users. So, don’t hesitate to try it yourself!
Want to create faded or blurred edges in a picture?
Hit this button and do it with hassle-free PhotoWorks!
How to Use GIMP to Soften Edges of Photos
If you’d like to try another program, you can edit image edges with GIMP. This is a free photo editor that offers almost all the standard features available in Photoshop, such as cropping, resizing, sharpening, along with more advanced features. However, some users find the interface of GIMP rather clunky and difficult to navigate. In case you don’t mind that, then let’s see how you can blur the edges of a picture using this program.
Step 1. Select the Edges
After you add the needed picture, click Select and choose Rounded Rectangle. Then use the slider to adjust the radius and hit OK.
Step 2. Blur the Selection
Go to Select and hit Feather to set the amount of feather. Make sure the setting called “Selected areas continue outside the image” is checked. Then click OK. In the Select menu, choose Invert and press the Delete key to blur the edges of the photo.
Step 3. Edit the Background
Create a new layer and place it under the main one. In the Fill With dropdown menu, select the desired option: Transparency, Pattern, White, and so on.
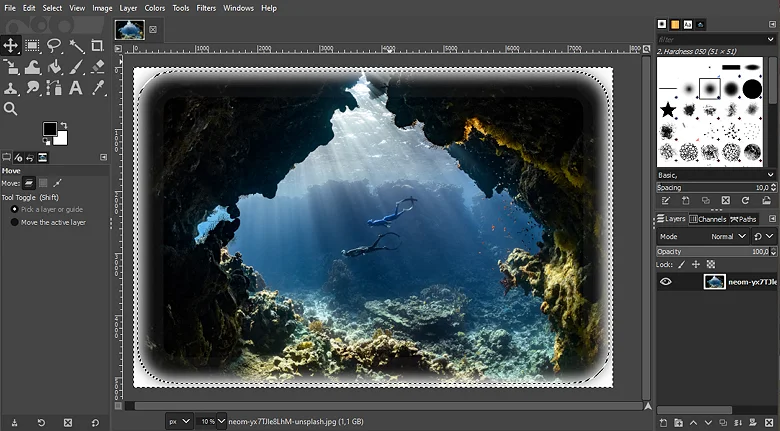
Blurring edges with GIMP, a desktop photo editor
How to Fade Edges of a Photo Online
Want to edit pictures without installing anything on your PC or laptop? Then fade edges of your photos online using Lunapic, an Internet-based photo editor with an extensive set of tools. Whether you want to make small changes or significantly enhance an image, Lunapic can help you with it. The program allows you to adjust focus, dehaze a picture, fix the perspective, apply filters, and more. Here’s how you can create an edge fade border in your photos without leaving the browser.
Step 1. Upload a File to the Website
Hit Select File to upload a picture or use the URL. The program will automatically process the photo.
Step 2. Adjust the Edges
After Lunapic softens the edges of the photo, you can customize the changes. First, choose the edges color or keep them transparent. Second, change the border size. Then hit Apply and click Download Now to save the new picture.

Fading edges online with the Lunapic tool
Conclusion
Now you know how to fade the edges of a photo! We have explored 3 easy ways to change the edges: with PhotoWorks, GIMP, and Lunapic. So, you can choose any of these tools and start the photo editing journey right away!
Edit the edges in a flash with PhotoWorks!