How to Make an Animated Travel Map Video:
Easiest Ways

Animated travel map videos have become immensely popular among travel enthusiasts and vloggers. These videos provide a visual representation of the places you have visited and give the viewer a sense of the journey you have taken. With the right tools and techniques, creating moving maps is easier than you might think. To ease your choice, we’ve picked 4 programs for every budget and device and created a step-by-step tutorial on how to make travel animation in each of them.
How to Make Animated Travel Map Videos in SmartShow 3D
Want to design a travel animation on your PC? Opt for SmartSHOW 3D. This user-friendly slideshow maker lets you create map-animated videos in a flash, thanks to the diversity of built-in maps, soundtracks, and animation effects. To get started, click the button below to download the installation package and do the following steps.
Step 1. Pick a Map
Run this animated maps software after installation. Choose the New Project option and go to the Effects tab. Double-click on the Travel Map icon. In the window that pops up, select a map from the built-in collection, ranging from retro to modern with famous sights. If you don’t find the map you need, you can upload it from your computer. Plus, you can zoom in to close up a particular area on the map and click Next.
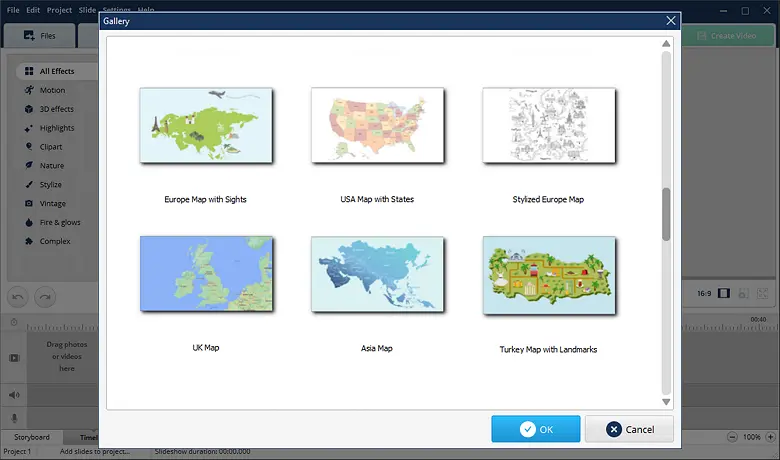
Choose a map of the world, a continent, or a single country.
Can't find the right map or want to add an airplane, train, or car sound later? Check out royalty-free stock images and audio on websites like Pixabay, Adobe Stock, or Envato. Download all the files you need for free, or use a free trial period.
Step 2. Add Map Markers
Now you need to draw your route. Think about the places you’ve traveled to and pin them with map markers. Just double-click on the location to add them in the corresponding order. Add as many as you need. Once you’ve finished, hit Next to customize your map.
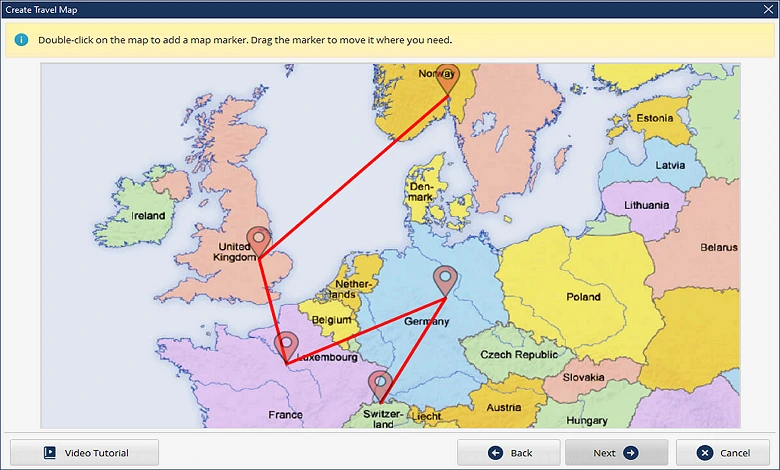
Mark the places you've visited
Step 3. Build Your Travel Map
It’s time to work with map animation. Pair each marker with a matching location photo from your trip - this image will appear next to the marker when the vehicle icon reaches it. Pick the route image and the vehicle - a plane, car, train, bus, or boat. Adjust the vehicle speed depending on the distance between locations. Choose the marker icon design to make your map look better.
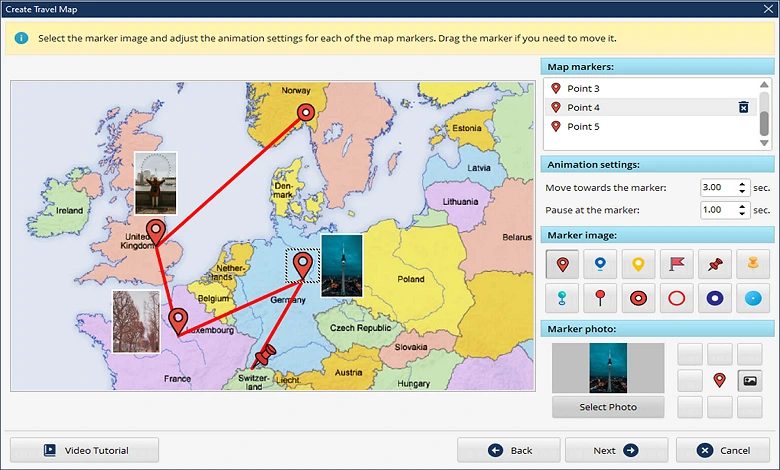
Pin your vacation photos to the map
Step 4. Make Final Adjustments
Check your creation in the preview window. If you want to make small adjustments, click the Edit Slide button. Here you can add sound effects (for instance, the noise of a train, a flying plane or sea waves) to make your animated travel map video more immersive. Just go to the Sounds tab and choose an audio file from the built-in library or load one you downloaded from stock websites.
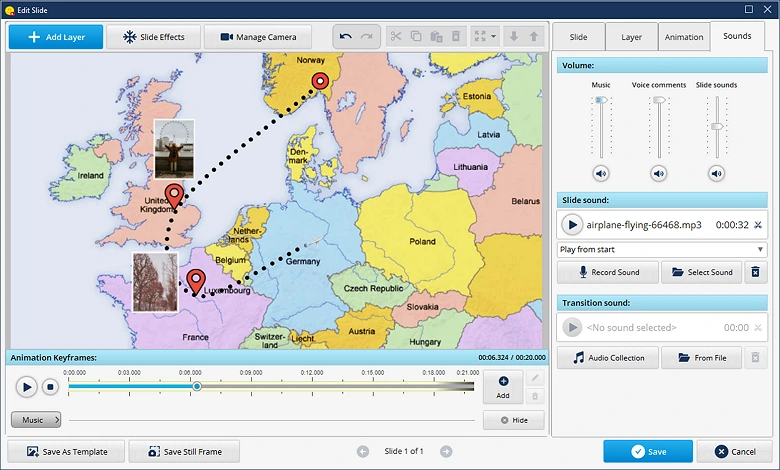
Level up your map by adding sound effects
Step 5. Save Your Creation
Click the Create Video button and choose the output format to download your map. You can export videos for TV, DVD, smartphones, and social networks or as MKV, AVI, MP4 files.
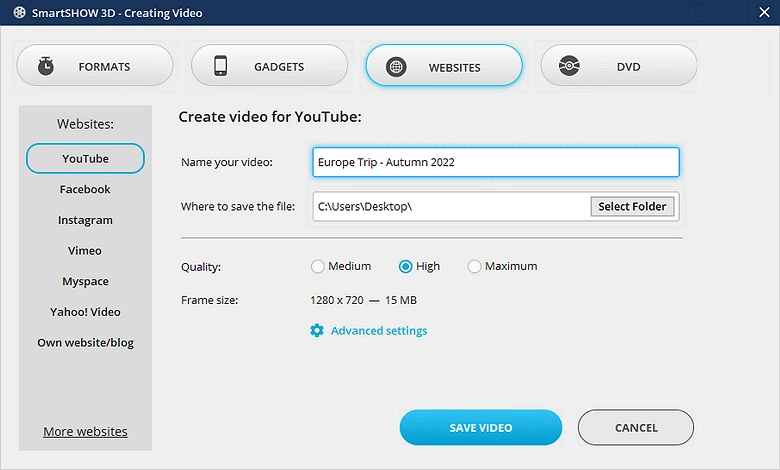
Select the export format among the 30+ available
Prefer watching video tutorials over reading ones? Check out how to create interactive travel maps in our video guide below and see SmartSHOW 3D in action.
Looks cool, right? Stop imagining and start creating your animated map with cool photos from your trip! Just click the button below to download a free trial version now.
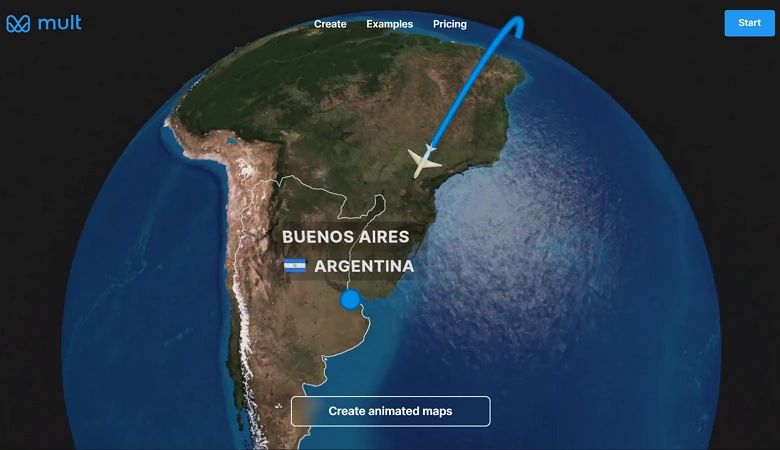
How to Generate Map Travel Animation in Mult
Don’t want to install anything on your computer for some reason? Try out Mult. It’s a web-based application with an intuitive interface that lets you create videos about your travels quickly and easily. Check out an easy-to-follow tutorial below:
Step 1. Open the Website
Once you visit the website page, you’ll see a demo video of what your creation might look like. Sign up to be able to build your own animated world map.
Create a free account on mult.dev
Step 2. Add Your Photos and Locations
Click on the Route icon on the left side of the screen and add the cities you’ve visited. To upload your photos or stickers, switch the slider button and then click Add Photos. You can also choose the vehicle. Hit the plane icon next to the city name to select the means of transportation you need out of the 13 available, including car, train, ferry, and helicopter.
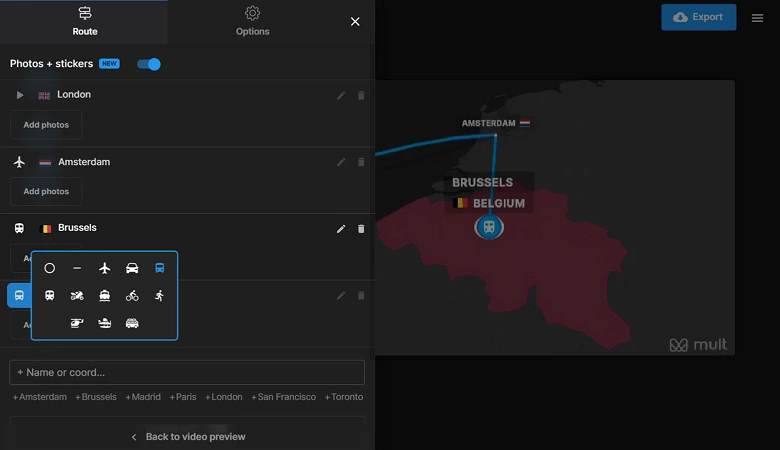
Choose a way of traveling for each destination
Step 3. Customize Your Map
Switch to Options to modify your animated road map. Choose the map style and add a title. In the Pro version, you can also change the active region and line colors, as well as adjust the speed and hide the logo watermark.
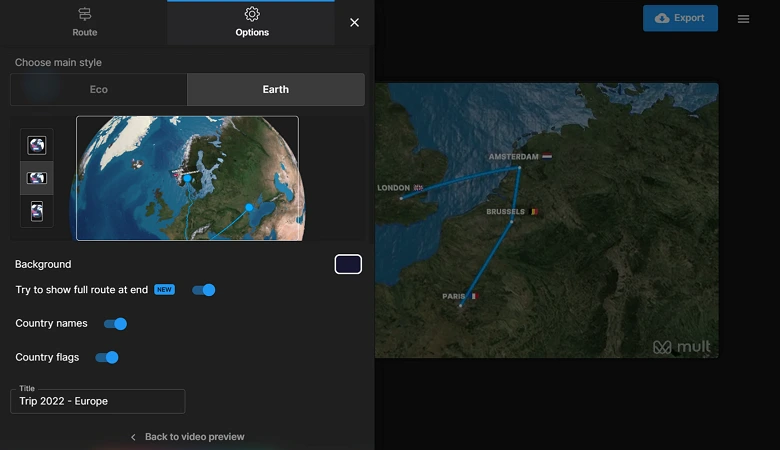
Choose the aspect ratio for PC/TV, smartphones, or a square one
Step 4. Download Your Animation
Once you’re happy with the result, click the Export button. Wait a bit while the app generates your video, and then select Download MP4.
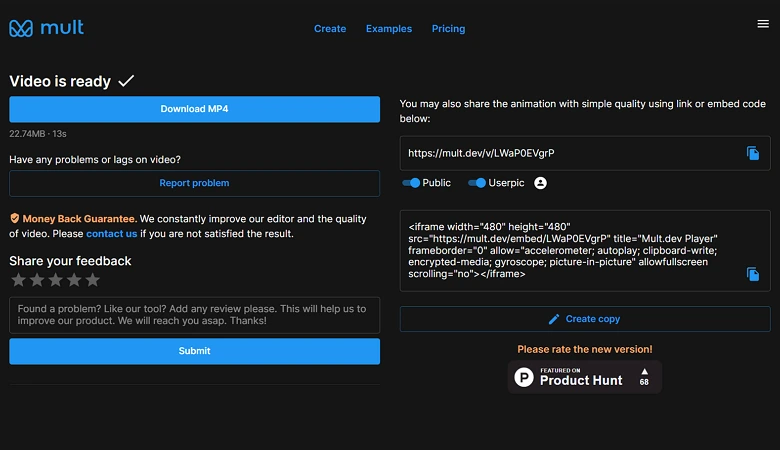
Configure the privacy settings of your new video.
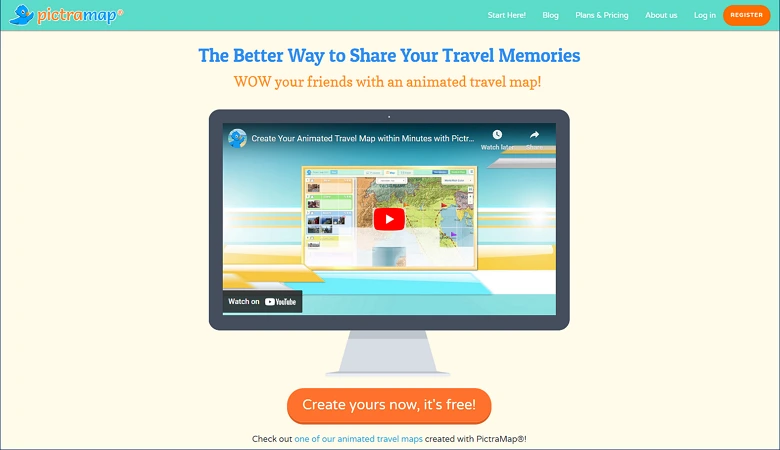
How to Make Traveling Animation in Pictramap
If you’re on a tight budget, check out Pictramap. It’s a free web-based platform that allows you to create custom maps with pictures. Users of all levels can handle this program thanks to its simple and clear interface. Since it’s an online app, you should sign up before you begin working on your project. Just click “Create yours now, it’s free” and register. Now, you’re ready to get started!
Step 1. Upload Your Photos
Start your animated map path by adding photographs. In the Pictures tab, drag and drop your vacation photos into the app. Images with GPS data will be placed directly on your project map. Otherwise, they will go into the Unsorted section, so you can manually attach them later.
Check out the tooltips for faster navigation in the program
Step 2. Create a Travel Map
Switch to the Map tab. Add the places you’ve visited, customize the pins and route, and choose the means of transport. You can also change the map design by picking one of the 10 available. The animation connecting your paths will be added automatically. Pin the pictures from the Unsorted box to the correct destination.
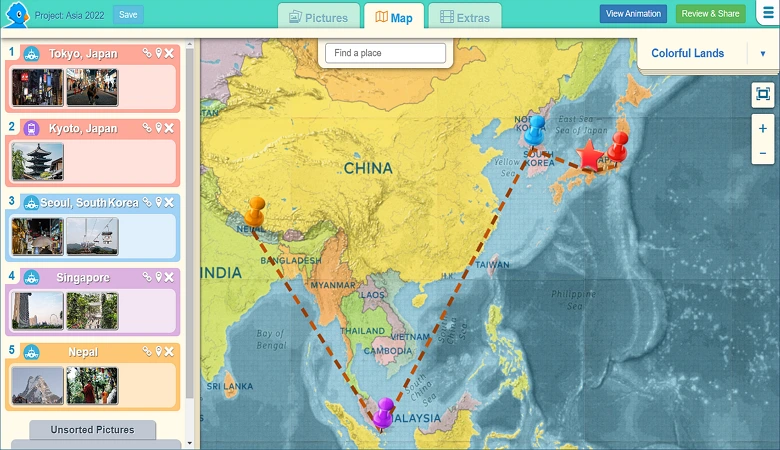
Click on the path line to change its color
Step 3. Improve the Map Appearance
If you’ve got the Pro version, you can do some more adjustments. Go to the Extras tab and add an intro and ending, overlay music, and change the map video duration. You can also play with animation settings and choose from a selection of font styles.
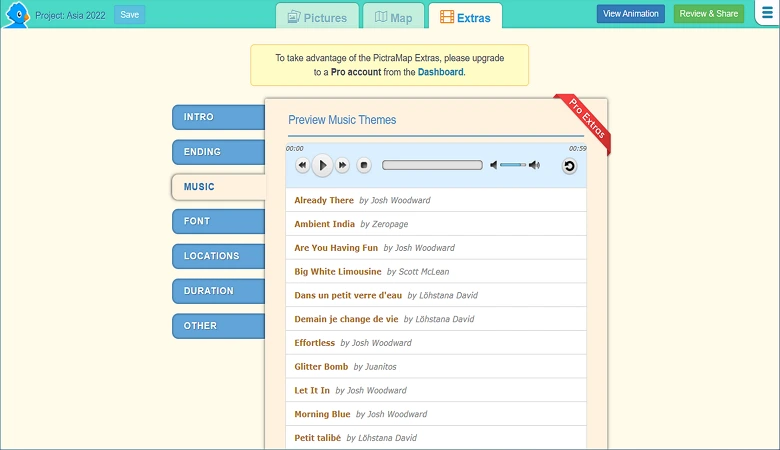
Browse through the built-in soundtrack collection
Step 4. Save Your Creation
After all the adjustments, click View Animation to preview your project. If you’re satisfied with the result, go to the Review & Share page to save the video on your PC or share it on social media.

Change the video’s privacy settings with a single button click
How to Create an Interactive Travel Map in Tripline
Want to design a map of your travel journey on your smartphone? Go with Tripline. This platform allows you to create travel animated maps to journal everything you’ve visited, seen, or tried. With Tripline, you can build your projects on the go. Just start it on your smartphone or tablet and continue on your PC, and vice versa.
Step 1. Create an Account
Download the app from the AppStore or Google Play, or open the website page. To start creating road maps in Tripline, you first need to sign up.
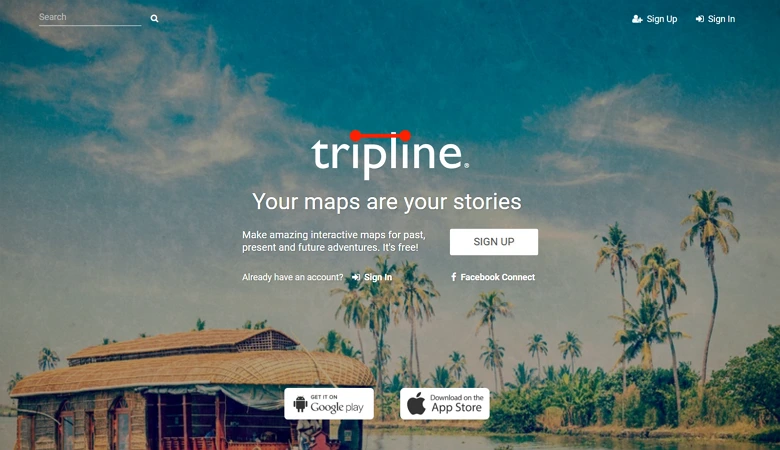
Use your Facebook account for a quick connect
Step 2. Build a Map
Start your creation by clicking the New Map button. Add the title of your map and choose the privacy settings by making it public or private. Go to the next step by clicking Create My Map.
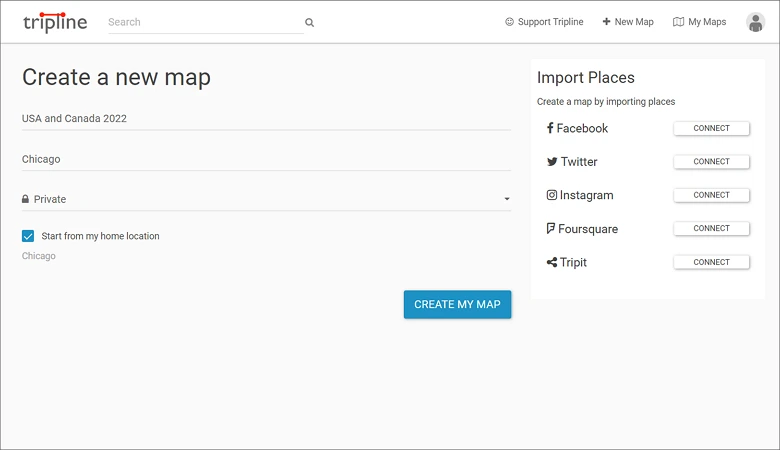
Speed up your map creation by importing places from your social networks
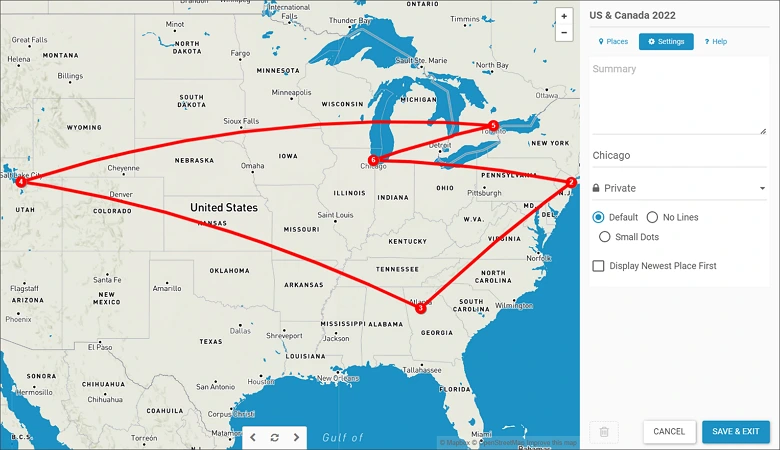
Step 3. Define Your Locations
Add the cities you’ve been to and the places you’ve visited (restaurants, hotels, airports, sights, etc.). Based on these locations, the program will automatically create a travel map. You can customize it by adding the dates you’ve been to each place and writing comments with your thoughts about those locations.
Write a summary of the whole trip
Step 4. Save Your Travel Map
Once you've finished building your map, click on the Save & Exit button. Go back to your maps and preview your creation. Based on the data you’ve filled in, Tripline also calculates the number of places you visited, the distance you flew or drove during the entire trip, and how many days you spent traveling.
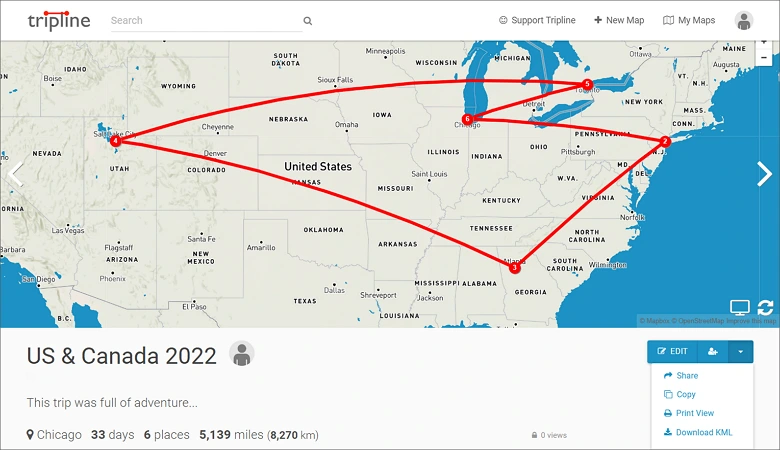
Share your travel map via social media, download it to your device, or print it out
Conclusion
Creating an animated travel map video may seem daunting, but with the right tools and techniques, it's easier than you think. By following these steps and using SmartSHOW 3D, Mult, Pictramap, or Tripline, you can create an engaging video that showcases your travels and captivates your audience. For useful tips on how to make a full-length travel video, not just a map, follow the link. Start planning your next adventure and get ready to build your own cool animated travel map video!