
How to Make a Slideshow on Windows 10: Easy Guide
Looking for software to create a photo slideshow? There are plenty of options for Windows users who need to put a slideshow together, but very few “great” ones. In a search for the best image slideshow maker, you’ll probably come across several programs that are easy to use and understand, but lack important features. The software options that do have high-quality features tend to be expensive and tricky to navigate.
Now you don't need to settle for one or the other. Here, we’ve selected some Windows 10 slideshow makers that get the job done without breaking the bank or requiring hours of practice to master. We’ve also included step-by-step guides to ease your slideshow creation. So, let’s get started!
How to Build a Slideshow on Windows 10
How to View Slideshows on Windows 10
FAQ
How to Make a Picture Slideshow with Music on Windows 10
Think that making a picture slideshow is difficult? It isn’t. This process is quite simple once you break it down into several steps and use an uncomplicated slideshow maker. Let’s walk through them together.
1. SmartSHOW 3D
2. Microsoft Photos
3. Adobe Express
1. SmartSHOW 3D
SmartSHOW 3D is a slideshow making software for showing off your photographs in an entertaining way. The program has a user-friendly interface and a handy wizard for complete newcomers. It lets you spice up your slideshow with animations, 3D photo collages, cliparts, etc. You can also overlay soundtracks from the built-in collection or engaging voice comments recorded right here in the program. One of the program's highlights is the Animated Travel Maps feature with interactive vehicles & route images that can take your vacation video to the next level.
Pros:
Cons:
How to Make a Slideshow with SmartSHOW 3D
These are the steps you need to follow to create an eye-catching slideshow with this software.
Step 1. Install and Run SmartSHOW 3D on Your PC
Click the button below for a speedy download of SmartSHOW 3D, then find the program on your computer and open it up! The startup wizard will appear to help you begin. Now you're ready to get started with your new slideshow maker.
Step 2. Find a Perfect Template for Your Picture Slideshow
Get professional results in 5 minutes with a ready-made theme or get creative and start from scratch, it's up to you! With more than 200 templates to choose from, you're off to a quick start either way. Look over a vast collection of themes, then explore the titles, collages, and clips SmartSHOW 3D has to offer as you add photos to your project.
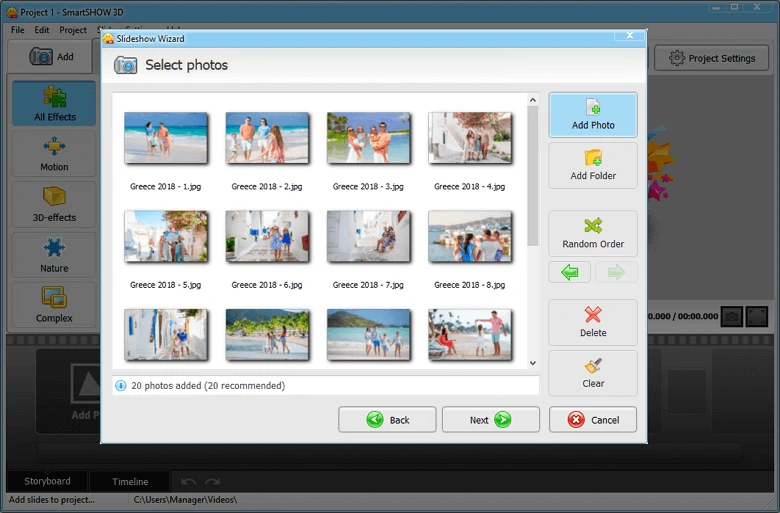 Choose a suitable project format and add your pictures
Step 3. Choose from Hundreds of Awesome Effects
Drag and drop effects into your project with ease using this Windows 10 slideshow maker! Add snow to your winter photo slideshow or use complex effects to combine rotation, zoom, and more into one animation. Incorporate highlights, textures, 3D, and glow effects to really make your photos pop. Make it even more exciting by creating your own transitions in the Transition Wizard.
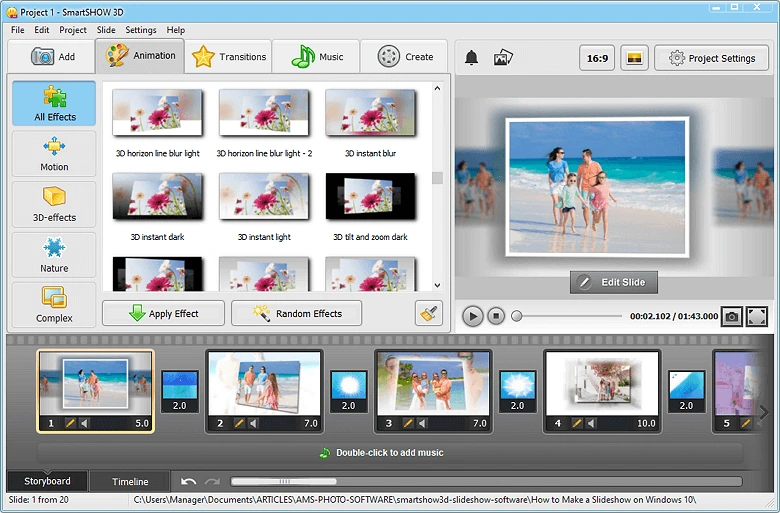 Spice up your slideshow with stunning effects
Step 4. Pick the Soundtrack and Add Voice Comments
SmartSHOW 3D comes with 200+ music tracks and sound effects -- all completely royalty-free! With so many to choose from, you can match the mood of any slide. Synchronize your slideshow with the music for a movie-like experience. Then, record voice commentary with your default microphone to personalize your video.
 Set the mood of your slideshow with music and add voice comments to tell a story
Step 5. Create Your Slideshow with Music on Windows 10
Want to watch your video on the go or share it with millions on YouTube? No problem. After you've perfected your slideshow, use specialized save settings to optimize it for TV sets, mobile devices, or burn it straight to a DVD. Create as many copies as you want or need! Now you're ready to start working on your next video masterpiece.
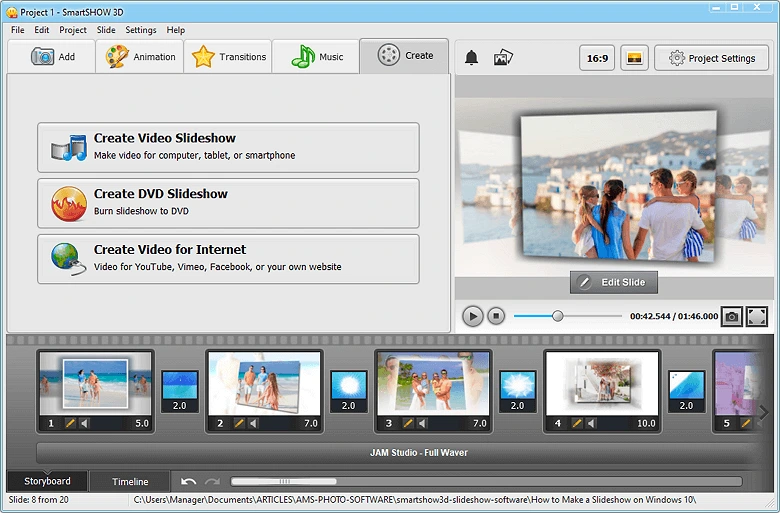 Save your creation in a suitable format to share it with your friends and family
Want to turn your photos into a stunning slideshow hassle-free?
Get started with SmartSHOW 3D now!
2. Microsoft Photos
Microsoft Photos, also known as the Photos app, is commonly used as a program for sorting and storing images and videos. This application comes pre-installed on Windows 10 PCs and contains a slideshow making feature. There is a built-in Video Editor that lets you combine your photographs, enhance them with filters, overlay background music, and apply motion & 3D effects.
Pros:
Cons:
How to Build a Slideshow in Microsoft Photos
Take a look at the steps below to find out how to build a slideshow with this app.
- Open the MS Photos app. Go to the Video Editor tab and create a New Video Project. Hit the Add button to upload your images and videos into the program.
- Drag & drop your content into the storyboard. Adjust its duration, rotate and remove black bars if necessary.
- Enhance your slideshow. Pick the slide and spice it up with effects and filters using
same-name buttons. - Overlay a soundtrack. Now let’s add some background music. Choose an audio track from the built-in library or click the Custom Audio button to load a song from your PC.
- Save your creation. In the top right corner, click Finish Video and select the highest quality.
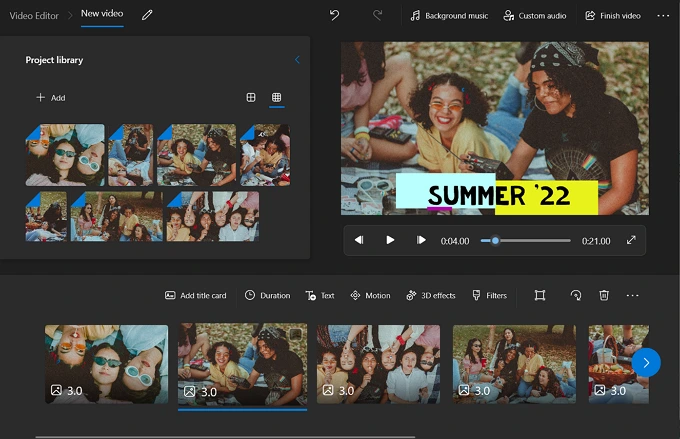 Video Editor, built into MS Photos, may also serve as a slideshow maker
3. Adobe Express
Adobe Express is an online service that allows you to create virtually any type of visual content, including slideshows. The program comes with a built-in collection of stock images and a few pre-made templates to speed up the video making process. Just use your photographs and videos, mix them with background music or voice comments, and enhance them with catchy captions and cliparts. What’s more, Adobe Express saves your project, so you won’t lose all your efforts if you close the window by accident. There is no way to customize animations, font styles, and image layouts to your liking, though, other than by selecting from a few ready-made ones.
Pros:
Cons:
How to Design a Slideshow in Adobe Express
Follow these simple steps to create your slideshow using this online tool:
- Sign up. Since Adobe Express is an online tool, you have to create an account first. Follow the link above, choose a free plan and start creating. You can begin from scratch or select a story template.
- Add photos and videos. Click the + icon to start filling the storyboard. You can upload your images and video clips or use Adobe Stock footage.
- Jazz up your slideshow with some music. Go to the Music tab in the sidebar and pick a tune from the in-program collection or add a song from a folder on your PC. Alternatively, overlay a voiceover. Just press and hold the microphone button for recording.
- Complement your creation with text and animations. Hit the + icon to add captions. To set up transitions and slide animation, pick a ready-to-use theme from the same-name tab in the sidebar.
- Export your slideshow. First, click the Preview button at the top of the screen to check your creation. Once you’re satisfied, download it to your computer or share it via a link.
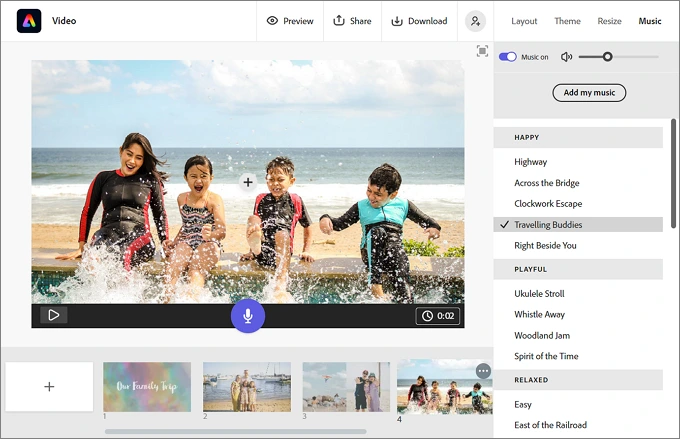 Make eye-catching yet simple slideshows with Adobe Express
How to View a Slideshow on Windows 10 with Built-in Apps
Want to quickly showcase your pics to family and friends as a nice presentation without building an actual slideshow? Then, you can use the following Windows 10 photo viewers in slideshow mode:
1. Photos App
2. File Explorer
1. Photos App
The Photos app is used as a Windows media player to open images as well. You can view photos in slideshow mode without having to open the application itself and create the actual presentation. This lets you save lots of time and effort.
Pros:
Cons:
How to View Images as a Slideshow in the Photos App
Follow these simple steps to preview your images as a slideshow without actually making one:
- Open an image you want to display using the Photos app. If the application is set as the default image opening application, just double-click on your picture file. Otherwise, right-click on a photo, hover over Open With, and pick Photos.
- Start the slideshow. Click the three-dot button above the opened photo. In the drop-down list, scroll down and select Slideshow.
- Enjoy your photo slideshow. Once started, the slideshow will cycle through all the pictures stored in the folder associated with the initial photo.
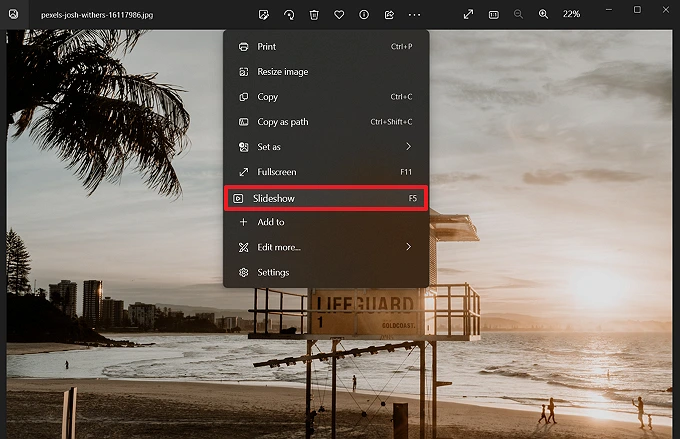 View your photos in slideshow mode with the Photos app
2. Picture Tools in File Explorer
File Explorer is a default application for managing files and folders on Windows computers. You can also use it as a Windows 10 photo viewer and play slideshows from within it. To do so, you need the Picture Tools option where the slideshow mode is hidden.
Pros:
Cons:
How to View Pictures in Slideshow Mode Using File Explorer
These are the steps you need to follow to preview your photographs as a slideshow without having to create one:
- Open File Explorer. Click the folder icon located on the taskbar.
- Begin the slideshow. Single-click on any image you want to display, or select several folders to bring up the Manage tab with the Image Tools option at the top of the window. Click it and then select Slideshow.
- Adjust the speed. Open the slideshow settings on Windows 10. Simply right-click on the picture while watching the slideshow and change the slide speed in the pop-up menu.
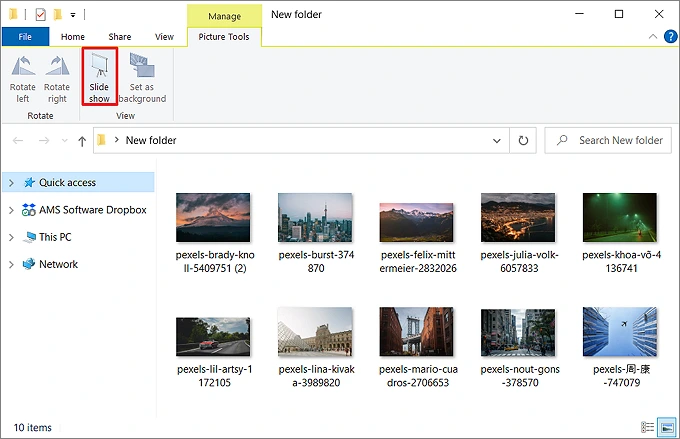 Display images as a slideshow from multiple folders at once with File Explorer
FAQ
There are several ways of how to make a slideshow on Windows 10 PCs. You may use the built-in Microsoft Photos app, try out Adobe Express online, or install dedicated slideshow software named SmartSHOW 3D. Follow this link to find out more.
Absolutely! Here’s what you can use:
Built-in programs:
1. Microsoft Photos
2. File Explorer
Third-party programs:
1. SmartSHOW 3D
2. Adobe Express
On a Windows 10 PC, you can view photos in slideshow mode for free without having to make an actual slideshow. To do this, you can either use the Photos app or the Picture Tools option in File Explorer. Follow the link to find out more.
Here are some options available to you:
1. View your photographs from a folder in slideshow mode using either the Photos app or File Explorer. Just open any image from the folder you want to display, right-click and select Start Slideshow. Alternatively, single-click on an image or a folder and choose the Picture Tools option and then Slideshow in the Manage tab.
2. Create an engaging video slideshow from your photos with catchy music and special effects using SmartSHOW 3D. Here are a few easy steps:
Step 1. Install and run the software on your PC.
Step 2. Pick the Slideshow in 5 Minutes option, choose a template, and load your images.
Step 3. Select the background music from the built-in collection.
Step 4. Preview your creation and export it.